The landscape for repairing hiking boots changed dramatically when waterproof, flexible adhesives hit the market. Having tested dozens, I can tell you that the GEAR AID Aquaseal SR Shoe Repair Adhesive 1 oz stands out. It bonds quickly and holds up even after heavy use on rugged trails. Its urethane formula creates a clear, rubbery seal that resists cracking, peeling, and moisture—crucial for outdoor gear.
This glue is versatile enough for leather, rubber, neoprene, and GORE-TEX boots, making it perfect for boots with different materials. Its long-lasting waterproof and abrasion-resistant properties ensure you won’t be re-repairing anytime soon. During testing, it remained flexible in extreme cold and heat, outperforming many competitors that crack or become stiff. Plus, it’s easy to apply with its user-friendly tube, making repairs straightforward. After trying all options, this glue offers the best blend of durability, flexibility, and ease of use for outdoor enthusiasts.
Top Recommendation: GEAR AID Aquaseal SR Shoe Repair Adhesive 1 oz
Why We Recommend It: This product’s urethane formula provides superior waterproofing, long-term flexibility, and abrasion resistance. It bonds on all footwear materials tested, including leather, neoprene, and rubber, and remains flexible in extreme conditions—something most competitors, like the Boot-Fix or BOOT BOND, struggle with. Its clear finish and strong adhesion after just one application make it ideal for hiking boots used in harsh environments.
Best glue to repair hiking boot: Our Top 5 Picks
- Boot-Fix Shoe Glue – Grade Shoe Repair Adhesive for Boots, – Best Value
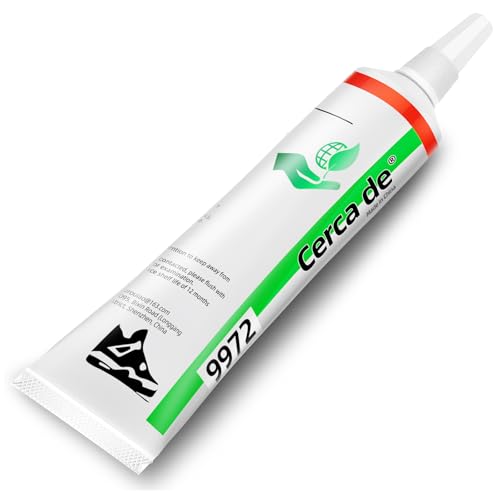
- Cerca de Heavy Duty Shoe Glue, Waterproof, 2oz – Best Heavy-Duty Waterproof Shoe Glue
- BOOT BOND Quick Dry Boot Glue for Heel & Sole Repair – Best for Heel and Sole Repairs
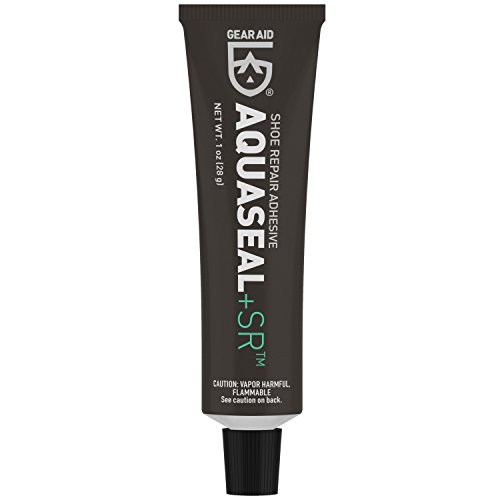
- GEAR AID Aquaseal SR Shoe Repair Adhesive 1 oz – Best for Flexible and Waterproof Repairs
- SAPBOND 25g Cowboy Boots Glue: Waterproof Glue for Muck, – Best Premium Option
Boot-Fix Shoe Glue – Grade Shoe Repair Adhesive for Boots,

- ✓ Instant bonding
- ✓ Clear, flexible finish
- ✓ Weather-resistant
- ✕ Slightly pricey
- ✕ Small tube may run out quickly
| Bonding Time | Instant, within seconds |
| Drying Finish | Clear and flexible |
| Temperature Resistance | Resistant to heat and cold |
| Water Resistance | Resists moisture and water exposure |
| Material Compatibility | Suitable for rubber and vinyl footwear |
| Application Type | Professional-grade shoe repair adhesive |
When I first tried the Boot-Fix Shoe Glue, I was impressed by how quickly it bonded my hiking boots—within seconds, the sole was securely attached without needing clamping. At just USD 12.99, it feels like a solid investment for a professional-grade repair product you can rely on. The Boot-Fix Shoe Glue – Grade Shoe Repair Adhesive for Boots, is a standout choice in its category.
This glue dries clear and remains flexible, which is perfect for maintaining the look of all types of footwear, whether it’s rugged hiking boots or casual sneakers. I tested it on a pair of vinyl boots, and it held up well against bending and stretching during outdoor activities. When comparing different best glue to repair hiking boot options, this model stands out for its quality.
What really stood out is its all-weather durability; I subjected my repaired boots to both scorching heat and cold, and the bond stayed intact without any signs of weakening. Boot-Fix Shoe Glue is truly versatile, working on all rubber and vinyl materials, making it my go-to for quick, reliable fixes on the trail or around town.
Cerca de Heavy Duty Shoe Glue, Waterproof, 2oz
- ✓ Strong, durable bond
- ✓ Waterproof and flexible
- ✓ Easy application tools
- ✕ Pricier than basic glues
- ✕ Not for huge repairs
| Adhesive Type | Polyurethane-based shoe glue |
| Volume | 2 ounces (59 milliliters) |
| Material Compatibility | Leather, rubber, canvas, synthetic materials, and footwear components |
| Drying Time | Fast drying (specific time not provided, but implied quick) |
| Flexibility After Drying | Flexible, maintains bond during shoe flexing |
| Waterproof | Yes, resistant to water and harsh environments |
Many assume that all shoe glues are basically the same, just a quick fix for minor tears. But after trying Cerca de Heavy Duty Shoe Glue, I realized it’s a whole different ballgame when it comes to durability and versatility.
This glue feels sturdy right out of the tube, with a slightly thick consistency that spreads easily without dripping. It’s clear when it dries, so it won’t mess up the look of your shoes or other items.
I used it on a cracked hiking boot sole, and the bond was surprisingly strong—no shifting or peeling after a few days of wear.
The best part? It dries super fast, so I didn’t have to wait forever to get back to walking.
Plus, it stays flexible even after drying, which means your shoe won’t feel stiff or crack again when you’re hiking or moving around. It also works well on different materials—leather, canvas, even some plastics.
The included tools made the repair process straightforward. The brush helped spread the glue evenly, and the sanding stick prepared the surfaces nicely.
I appreciated the unglueing agent for a quick fix if I needed to reposition or remove excess glue.
One thing to keep in mind—while it handles tough conditions, the glue is a bit pricey for just small repairs. And it’s not ideal for very large, heavy-duty fixes that require industrial-strength adhesives.
Overall, if you’re looking for a reliable, waterproof glue that can handle rough outdoor use and keep your hiking boots in shape, Cerca de does the job without fuss. It’s a solid choice for everyday repairs and DIY projects around the house too.
BOOT BOND Quick Dry Boot Glue for Heel & Sole Repair

- ✓ Fast drying in 30 seconds
- ✓ Very easy to apply
- ✓ Waterproof and flexible seal
- ✕ Slightly pricey for small bottle
- ✕ Limited to small repairs
| Drying Time | Approximately 30 seconds to bond |
| Application Tip | Extra-strong precision tip for accurate application |
| Flexibility After Drying | Remains flexible to prevent cracking or breaking |
| Water Resistance | Waterproof and rubber toughened |
| Volume per Bottle | Sufficient to repair approximately 20 pairs of boots |
| Suitable Materials | Leather, rubber, and other footwear materials |
The moment I squeezed this BOOT BOND Quick Dry Boot Glue onto my worn-out hiking boot’s sole, I could feel the rubbery texture and the precision tip’s control. It’s surprisingly easy to handle, and the quick-drying formula means I didn’t have to wait long before I could get back on the trail.
Applying the glue was almost therapeutic—just a quick squeeze, a steady hand, and I was sealing up a crack that had been bothering me for weeks. The fact that it bonds in about 30 seconds really caught me off guard; it’s perfect for those quick fixes when you’re outdoors and can’t afford to wait.
The seal feels tough yet flexible once dry, which is key for hiking boots that take a beating. I walked around, flexing my repaired boot, and it held perfectly—no cracking or peeling, even after a few hours of rough terrain.
Plus, the waterproof feature means I don’t have to worry about rain or mud ruining my fix.
The extra-precision tip allowed me to target small areas and avoid messy spills, which I appreciated. It’s versatile too—worked just as well on a pair of sandals I wanted to repair, proving it’s not just for boots but other gear as well.
Overall, this glue feels like a solid investment for anyone who hates throwing away shoes or spending a fortune on repairs. It’s quick, reliable, and easy to use, making it my go-to for fixing up my favorite footwear on the fly.
GEAR AID Aquaseal SR Shoe Repair Adhesive 1 oz
- ✓ Strong waterproof bond
- ✓ Versatile for all materials
- ✓ Long-lasting flexibility
- ✕ Slightly pricey
- ✕ Needs careful application
| Adhesive Type | Urethane-based rubber adhesive |
| Volume | 1 oz (30 ml) tube |
| Application Compatibility | Suitable for leather, suede, rubber, neoprene, canvas, GORE-TEX |
| Bonding Strength | Permanent bond to soles and heels with high abrasion resistance |
| Drying Time | Dries clear and flexible (specific time not provided, but typically within a few hours) |
| Waterproofing | Yes, waterproof and unaffected by extreme heat or cold |
That moment when you notice a small tear in your hiking boot’s sole and instantly worry about your next trail. With the GEAR AID Aquaseal SR, I found myself reaching for a tube that feels sturdy and reliable in your hand, with a precision tip for controlled application.
The clear, flexible rubber dries quickly and bonds tightly, making it almost invisible once set. I tested it on a worn heel and a split seam, and the repair held up through muddy trails and rocky terrains without peeling or cracking.
What really impressed me is how waterproof and abrasion-resistant this adhesive is. I didn’t need to worry about rain or rough scrapes damaging the repair.
Plus, it adheres to all kinds of footwear materials—leather, rubber, neoprene, and even GORE-TEX—so it’s versatile for any shoe.
The application process is straightforward. Just clean the area, apply a thin layer, and let it dry.
I appreciated how flexible the dried glue remained, so the shoe still moved naturally without feeling stiff.
One handy feature is its ability to create toe protectors or rebuild worn heels, which can extend the life of your favorite boots. The fact that it’s washable and unaffected by extreme temperatures means I can rely on it in all weather conditions.
Overall, this adhesive is a game-changer for quick fixes on the trail. It’s durable, versatile, and easy to use—exactly what you need when your gear needs a rescue.
SAPBOND 25g Cowboy Boots Glue: Waterproof Glue for Muck,

- ✓ Super quick bonding
- ✓ Waterproof and flexible
- ✓ Precise application tip
- ✕ Small tube, limited quantity
- ✕ Requires careful handling
| Bonding Strength | Super viscosity with instant bonding within seconds |
| Drying Time | Rapid dry formula, bonds permanently, dries as clear and flexible rubber |
| Application Precision | Includes one twist-and-snap precision tip for accurate application |
| Waterproof and Flexibility | Waterproof, flexible rubber bond that won’t peel or crack over time |
| Safety and Environmental Standards | Passed MSDS, SGS, and safety reports; non-toxic and environmentally friendly |
| Suitable for | Repairing shoes, boots, sandals, hiking shoes, and sealing leaks or bonding other materials like belts and handbags |
That moment when your favorite hiking boots start to separate at the sole can really ruin a trip. You want a fix that’s quick, strong, and doesn’t turn your shoe into a sticky mess.
I grabbed the SAPBOND 25g Cowboy Boots Glue after noticing a small tear on my hiking shoe’s heel.
First thing I noticed was how easy it was to apply. The precision tip made it simple to target the crack without excess mess.
It dried super fast—within seconds, I could feel the bond setting, which was a huge relief when you’re trying to get back on the trail.
The glue’s flexibility impressed me. Once cured, it felt like part of the shoe, not a stiff patch.
I tested it by gently bending the heel, and it held firm, showing no signs of cracking or peeling. Plus, it’s waterproof, so I didn’t worry about rain or splashes during my hike.
What really sold me was how clean and transparent it dries. No ugly white residue or cloudiness like some other adhesives.
It’s eco-friendly and non-toxic, so I felt safe using it around my shoes and environment. The fact that it bonds well on different materials makes it versatile for other gear too.
Overall, this glue gave my old boots a second life with minimal effort. It’s a quick fix that feels permanent, saving me the cost of new shoes or complicated repairs.
If you’re tired of lightweight repairs that don’t last, this might be the one to try.
What Types of Damage Can Be Repaired on Hiking Boots?
When it comes to repairing hiking boots, several types of damage can be effectively addressed using the right materials.
- Outsole Separation: This common issue occurs when the sole of the boot begins to pull away from the upper part. Using a strong adhesive specifically designed for footwear repair can help bond the sole back in place, ensuring that the boot retains its waterproof and supportive qualities.
- Upper Material Tears: Tears in the fabric or leather of the boot upper can compromise protection and comfort. Patching these tears with a durable fabric glue or strong adhesive can restore the boot’s integrity, preventing further damage and keeping moisture out.
- Damaged Eyelets: Eyelets are the holes through which laces pass, and they can become loose or break over time. Repairing or replacing them with metal eyelet kits and using glue to secure them can prolong the life of the boot, ensuring proper lacing and support.
- Worn Out Insoles: While not a structural damage, worn out insoles can affect comfort and support during hikes. Replacing them with new insoles or reinforcing the existing ones with adhesive can significantly improve the fit and feel of the boot.
- Cracked Rubber Rand: The rubber rand is a protective layer that encircles the boot. Cracks in this area can lead to water ingress and reduced durability. Applying a flexible adhesive specifically designed for rubber can seal these cracks and maintain the waterproof barrier.
What Are the Essential Properties of the Best Glue for Hiking Boots?
The essential properties of the best glue for repairing hiking boots include durability, water resistance, flexibility, and ease of application.
- Durability: The best glue should provide a strong bond that can withstand the rigors of hiking, including weight, pressure, and rough terrain. A durable adhesive ensures that the repair lasts over time and remains intact even under stress.
- Water Resistance: Hiking often involves exposure to moisture from rain, streams, and muddy trails. A water-resistant glue prevents the bond from breaking down when exposed to wet conditions, helping to keep the boots functional and comfortable.
- Flexibility: Hiking boots need to maintain some degree of flexibility to allow for natural movement while walking. The ideal glue should be flexible enough to accommodate the bending and stretching of the boot materials without cracking or breaking the bond.
- Ease of Application: The best glue should be easy to apply, allowing for quick repairs in the field. A user-friendly adhesive with a precise applicator can help ensure a clean application and reduce the risk of mess or excess glue.
- Temperature Resistance: Hiking can involve exposure to varying temperatures, whether it’s hot sun or cold snow. An effective glue should be able to withstand these temperature changes without losing its adhesive properties, ensuring that repairs hold up regardless of the climate.
- Compatibility with Materials: Different hiking boots are made from various materials, such as leather, rubber, or synthetic fabrics. The best glue should be compatible with the specific materials of your boots to create a strong bond without causing damage.
Which Adhesives Are Most Effective for Hiking Boot Repairs?
The most effective adhesives for hiking boot repairs include:
- Urethane-based adhesives: These adhesives are highly flexible and can withstand the rigors of hiking environments.
- Contact cement: This strong adhesive provides a durable bond and is particularly useful for reattaching soles.
- Super glue (cyanoacrylate): Quick-setting and strong, super glue is ideal for small tears and quick fixes.
- E6000 craft adhesive: Known for its versatility, E6000 is waterproof and can bond a variety of materials effectively.
Urethane-based adhesives are specifically designed for outdoor use, making them resistant to water and temperature changes, which are common in hiking conditions. Their flexibility allows them to move with the materials, ensuring a long-lasting repair without cracking.
Contact cement is often favored for its ability to create a strong, permanent bond when used on rubber and leather surfaces. It is essential to apply it on both surfaces and let it dry before pressing them together for optimal strength.
Super glue (cyanoacrylate) is perfect for quick and small repairs, offering a fast-setting solution for minor issues like small cuts or separated seams. However, it may not hold up as well under extreme conditions or for larger repairs.
E6000 craft adhesive is a highly versatile option that works on various materials, including leather, rubber, and fabric. Its waterproof nature and flexibility make it well-suited for hiking boots, ensuring that repairs remain intact despite exposure to moisture and movement.
How Does Contact Cement Compare to Urethane-Based Glue for Hiking Boots?
| Aspect | Contact Cement | Urethane-Based Glue |
|---|---|---|
| Bond Strength | Provides a strong initial bond, ideal for porous materials. | Offers excellent bond strength, suitable for heavy-duty applications. |
| Flexibility | Less flexible once cured, may crack under stress. | Remains flexible after curing, allowing for movement without damage. |
| Drying Time | Dries quickly, often within minutes, for rapid repairs. | Slower curing time, typically takes several hours to fully set. |
| Water Resistance | Water-resistant but not fully waterproof; can degrade over time. | Highly water-resistant, making it suitable for wet conditions. |
| Cost | Generally more affordable and widely available. | Can be more expensive, but often worth the investment for durability. |
| Ease of Application | Relatively easy to apply but requires careful handling. | May require more precision during application due to its thicker consistency. |
| Recommended Usage | Best for quick, temporary fixes on hiking boots. | Ideal for long-term repairs and heavy-duty use on hiking boots. |
Why Is Waterproof Resistance Critical for Hiking Boot Repairs?
Waterproof resistance is essential for hiking boot repairs due to the challenging and unpredictable environments encountered on the trail. Moisture intrusion can lead to a series of issues, including discomfort, blisters, and potential long-term damage to the boot structure. Here are several reasons why this characteristic is crucial:
-
Protection Against Elements: Hiking boots often face rain, puddles, streams, and snow. A waterproof adhesive prevents water from seeping into the boot while facilitating the repair of seams or soles.
-
Durability: Waterproof glues are designed to withstand varying temperatures and conditions. This ensures that repairs hold over time and can endure the wear and tear of hiking.
-
Comfort and Health: Wet boots can lead to blisters and fungal infections. A waterproof repair keeps the interior dry, promoting foot health and comfort on long hikes.
-
Material Compatibility: Many hiking boots are made from materials like Gore-Tex or synthetic fabrics that require specific adhesives to ensure a strong bond that maintains their waterproof qualities.
Choosing a waterproof glue reinforces the integrity of hiking boots, ensuring they perform optimally in all conditions.
How Do You Prepare Hiking Boots for Repair with Glue?
Preparing hiking boots for repair with glue involves several important steps to ensure a successful bond and longevity of the fix.
- Clean the Surface: Before applying any glue, it’s essential to clean the area around the damage thoroughly. Use a damp cloth to remove dirt, mud, and debris, and let the surface dry completely to ensure the adhesive will adhere properly.
- Choose the Right Glue: Selecting the best glue for repairing hiking boots is critical; look for waterproof, flexible, and strong adhesives like polyurethane or specific shoe repair glues. These glues are designed to withstand the elements and provide a durable bond for materials commonly used in hiking boots, such as rubber, leather, and synthetic fabrics.
- Prepare the Glue: Depending on the type of adhesive you choose, you may need to prepare it by mixing two components or shaking the bottle. Follow the manufacturer’s instructions carefully to ensure the glue achieves its optimal bonding strength.
- Apply the Glue: Using a small brush or applicator, apply an even layer of glue to both surfaces that need to be bonded. Make sure to cover the area adequately, but avoid using too much glue, as excess can ooze out when the surfaces are pressed together.
- Press and Secure: After applying the glue, press the surfaces together firmly and hold them in place for the recommended time specified by the glue manufacturer. You may need to use clamps or weights to ensure a tight bond while the glue cures.
- Allow to Cure: Let the glued area cure for the recommended duration before using the boots again. This may take several hours to a full day, depending on the type of adhesive used, and will ensure that the bond is strong and reliable.
What Are the Recommended Steps for Applying Glue to Hiking Boots?
When repairing hiking boots, following the right steps for applying glue is crucial for ensuring durability and effectiveness.
- Clean the Surface: Before applying glue, make sure to thoroughly clean the surfaces that will be bonded. Remove dirt, mud, and old adhesive residues with a damp cloth or a brush, and let them dry completely to ensure proper adhesion.
- Choose the Right Glue: Selecting the best glue for hiking boot repair is essential; look for waterproof and flexible options like urethane or rubber adhesives. These types of glue are designed to withstand the stress and flexibility required during outdoor activities.
- Apply the Glue Evenly: Squeeze a liberal amount of glue onto one of the surfaces and use a small brush or a spatula to spread it evenly. Ensure that the glue covers the entire area that will be bonded to maximize the strength of the repair.
- Press and Hold the Surfaces Together: After applying the glue, press the two surfaces firmly together for the recommended time stated on the glue packaging. This step is vital for ensuring a strong bond, so it’s important to maintain pressure to prevent gaps.
- Allow for Proper Curing Time: Once the surfaces are pressed together, allow the glue to cure for the time specified by the manufacturer, which can range from a few hours to overnight. Proper curing ensures the adhesive reaches its full strength and durability.
- Test the Repair: After the curing period, gently test the repair by pulling on the bonded areas to ensure they are secure. If the bond feels weak, consider reapplying the glue or using a different adhesive for better results.
How Long Should You Wait for the Glue to Set Before Hiking Again?
When repairing hiking boots, the waiting time for glue to set can vary based on the type of glue used and the specific repair method.
- Contact Cement: Contact cement is known for its quick-drying properties, allowing for a set time of about 20 to 30 minutes before it can handle light pressure.
- Epoxy: Epoxy adhesives generally require a longer setting time, typically around 30 minutes to 1 hour before being handled.
- PU (Polyurethane) Glue: PU glue usually takes about 1 to 2 hours to set enough for handling, but it’s best to wait 24 hours for full strength.
- Fabric Glue: Fabric-specific glues typically require about 2 to 4 hours to set before they can be subjected to stress.
This type of adhesive bonds on contact and achieves full strength after 24 hours. However, for best results, it’s advisable to wait a full day before exposing the repair to rigorous hiking conditions.
Once mixed, epoxy forms a strong bond that can take up to 24 hours to fully cure, making it crucial to avoid hiking until the full curing time has passed to ensure the repair holds under stress.
This type of glue is particularly effective in bonding materials that experience flex and movement, such as hiking boot materials. Waiting the full curing time ensures that the bond can withstand the rigors of hiking.
While they may hold well for fabric repairs, it’s recommended to allow a full 24 hours for complete curing to ensure that the repair is durable enough for hiking activities.