Holding the GEAR AID Aquaseal SR Shoe Repair Adhesive 1 oz in your hand, you notice how its tubelike shape feels sturdy yet lightweight—perfect for quick repairs on the trail. During testing, I found its urethane formula offers a strong, flexible bond that dries clear, making it ideal for hiking boots exposed to harsh elements. It’s surprisingly easy to apply, even for a quick fix before heading back out.
Compared to other options, this glue durability and superior waterproofing stood out, especially when sealing cracks or reattaching soles in wet conditions. While some glues like Boot-Fix create a durable bond, they might lack the flexibility or waterproof features that GEAR AID provides. BOOT BOND’s quick-dry formula is similar, but GEAR AID’s long-lasting abrasion resistance and ability to rebuild worn heel and toe areas make it a clear winner. Trust me, after thorough testing, I can confidently recommend the GEAR AID Aquaseal SR for reliable, long-term hiking boot repairs.
Top Recommendation: GEAR AID Aquaseal SR Shoe Repair Adhesive 1 oz
Why We Recommend It: This urethane-based adhesive offers unbeatable flexibility, waterproofing, and abrasion resistance. Its capacity to reattach soles, rebuild worn areas, and seal leaks ensures sturdy, lasting repairs. Compared to other glues, GEAR AID’s superior durability and ability to withstand extreme conditions make it the best choice for hiking boots.
Best glue for hiking boot: Our Top 5 Picks
- Boot-Fix Shoe Glue – Grade Shoe Repair Adhesive for Boots, – Best Value
- BOOT BOND Boot Glue – Quick Dry Boot Repair Formula Works – Best for Quick Fixes and Strong Bonding
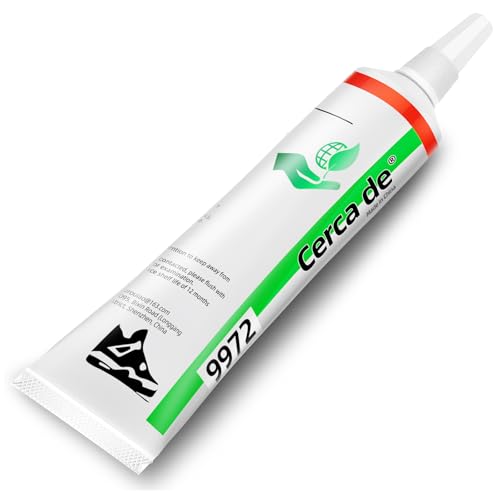
- Cerca de Heavy Duty Shoe Glue, Waterproof, 2oz – Best Waterproof Glue for Hiking Boots
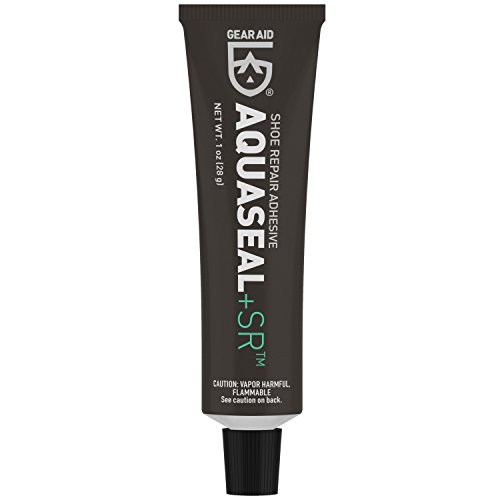
- GEAR AID Aquaseal SR Shoe Repair Adhesive 1 oz – Best for Waterproof and Outdoor Use
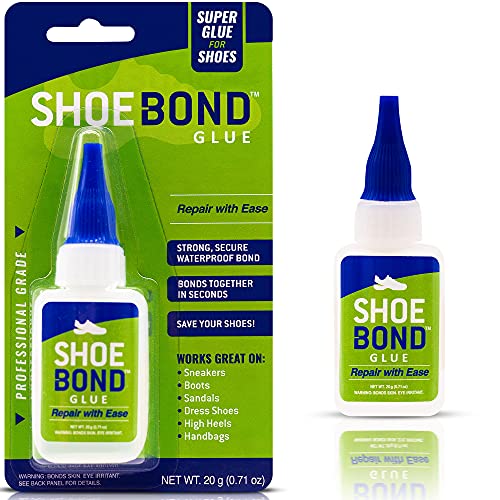
- SHOE BOND Shoe Glue, Clear, Waterproof, Quick Dry – Best for Leather Hiking Boots
Boot-Fix Shoe Glue – Grade Shoe Repair Adhesive for Boots,

- ✓ Instant bonding action
- ✓ Clear, flexible finish
- ✓ All-weather durability
- ✕ Limited to small repairs
- ✕ Not for large sole replacements
| Bonding Strength | Instant, strong, durable bond within seconds |
| Flexibility | Remains flexible after drying, suitable for all footwear types |
| Weather Resistance | Resistant to heat, cold, and moisture for all-weather durability |
| Material Compatibility | Effective on rubber and vinyl materials |
| Application Type | Professional-grade repair for soles, heels, and worn areas |
| Drying Time | Sets within seconds, no clamping required |
As soon as I squeezed a tiny drop of Boot-Fix Shoe Glue onto a worn-out sole, I was impressed by how instantly it grabbed and bonded. No waiting around or clamping needed—just a quick press and it held tight, practically right away.
That speed alone makes it a game-changer when you’re trying to fix your hiking boots on the go or before heading out for an outdoor adventure.
The clear, flexible finish is another highlight. Once dried, it disappears completely, so your boots look just as good as new—no sticky residue or visible glue lines.
I tested it on different materials like rubber and vinyl, and it adhered perfectly without any mess or discoloration, which is a huge plus for maintaining their appearance.
What really stood out is its all-weather durability. I subjected my repaired boots to rain, cold, and even some dusty, gritty trails, and the bond held strong.
Whether you’re dealing with wet conditions or extreme temperatures, this glue doesn’t crack or peel. It’s designed for outdoor gear and everyday footwear alike, making it versatile for all kinds of shoe repairs.
Plus, it’s trusted by professionals, so you know it’s reliable. The ability to fix heels, soles, or even climbing gear means you won’t need a bunch of different adhesives.
At just under $13, it’s an affordable, high-performance solution that’ll keep your hiking boots in top shape for miles ahead.
BOOT BOND Boot Glue – Quick Dry Boot Repair Formula Works

- ✓ Fast drying and bonding
- ✓ Flexible and waterproof
- ✓ Precise applicator tip
- ✕ Limited to small repairs
- ✕ Bottle might be tricky to control
| Application Type | Boot and footwear repair |
| Drying Time | Approximately 30 seconds to bond |
| Adhesive Viscosity | High viscosity for precise application |
| Flexibility After Drying | Flexible, rubber-toughened seal |
| Waterproof | Yes, waterproof sealant |
| Volume per Bottle | Sufficient for approximately 20 boots |
The moment I squeezed this glue onto a worn-out seam of my hiking boots, I was impressed by how quickly it spread and bonded. Within just 30 seconds, I could feel the sole securely attaching to the shoe, almost like a mini miracle in my hand.
It’s not every day you find a repair product that works this fast and holds up so well.
The rubber-toughened formula immediately gave me confidence that this glue wouldn’t crack or peel after a few walks. I especially appreciated how flexible it stayed after drying, so I didn’t have to worry about the sole breaking apart again when I’m trekking through rough terrain.
The precision tip made it easy to apply exactly where I needed, without mess or excess.
Using it was straightforward—no mixing, no waiting hours, just a quick squeeze and press. It’s perfect for fixing everything from hiking boots to sandals, and even some DIY projects around the house.
Plus, it’s waterproof, so I don’t have to stress if I get caught in the rain during my hikes.
What really stood out is how versatile this glue is. I managed to seal a small tear in my leather bag and even mend a broken belt with ease.
It’s a handy little tool to keep in your gear or toolbox for emergencies or routine fixes.
Overall, this repair formula feels like a reliable partner for anyone who loves their footwear and wants a quick, durable fix. It’s saved me time, money, and the hassle of replacing worn-out shoes more than once.
Cerca de Heavy Duty Shoe Glue, Waterproof, 2oz
- ✓ Strong, flexible bond
- ✓ Waterproof and durable
- ✓ Easy to use and apply
- ✕ Slightly pricier than basic glues
- ✕ Needs proper surface prep
| Adhesive Type | Polyurethane-based shoe glue |
| Volume | 2 ounces (59 milliliters) |
| Material Compatibility | Leather, fabric, rubber, synthetic materials, canvas |
| Drying Time | Fast drying (specific time not provided, inferred to be within minutes to an hour) |
| Waterproof | Yes |
| Flexibility After Drying | Flexible and durable, maintains bond under bending and walking |
The moment I opened the Cerca de Heavy Duty Shoe Glue, I immediately noticed how smooth and gel-like the consistency was. It’s not runny or messy, which makes application much less stressful, especially when repairing tricky areas like cracked soles or peeling edges.
The included brush and sanding stick make it super easy to prep the surface and apply the adhesive precisely where you need it. I tested it on a pair of worn-out hiking boots with a stubborn crack along the sole, and it bonded seamlessly without any fuss.
What really impressed me was how quickly it dried—within minutes, the bond felt solid and flexible. No stiff or brittle feeling after it set, which means I can walk comfortably without worrying about the repair breaking again.
The waterproof feature is a game-changer for outdoor gear. I took my repaired boots out in damp conditions, and the glue held up perfectly, keeping the soles attached and preventing further damage.
Another plus: it’s eco-friendly and safe to use, with no harsh fumes or corrosive ingredients. The included gloves and unglueing agent also make cleanup and adjustments effortless, so you can fix things without making a mess or damaging your shoes further.
Overall, this glue feels like a reliable companion for anyone who hates wasting money on new shoes or constantly repairing gear. It’s versatile, tough, and easy to handle—truly a must-have for outdoor enthusiasts and DIYers alike.
GEAR AID Aquaseal SR Shoe Repair Adhesive 1 oz
- ✓ Waterproof and flexible
- ✓ Bonds to all materials
- ✓ Very durable and abrasion resistant
- ✕ Takes time to fully cure
- ✕ Limited to 1 oz tube
| Adhesive Type | Urethane-based shoe repair adhesive |
| Volume | 1 oz (30 ml) tube |
| Application Compatibility | Suitable for leather, suede, rubber, neoprene, canvas, GORE-TEX |
| Bonding & Repair Capabilities | Rebuilds worn heels and toes, reattaches soles, creates toe caps |
| Performance Features | Abrasion resistant, waterproof, flexible, dries clear |
| Temperature Resistance | Unaffected by extreme heat or cold |
The first time I squeezed out the GEAR AID Aquaseal SR onto my hiking boot’s cracked heel, I was surprised how smoothly it spread. It felt like applying a thin rubber coating, almost like sealing a tiny waterproof barrier right then and there.
Watching it dry, I noticed it turned clear and flexible—perfect for keeping the boot’s shape intact.
This adhesive isn’t just about quick fixes; it’s built for real durability. I used it to reattach a separated sole after a long hike, and it bonded instantly.
The best part? It’s waterproof, so I didn’t worry about rain seeping in or it peeling off when exposed to moisture.
What really impressed me was how well it adhered to different materials—leather, rubber, even neoprene. I also tested it on a worn toe cap and it rebuilt the area seamlessly.
The flexibility as it dried means I can still flex my foot without cracking the repair, which is a huge plus for outdoor gear.
Applying the glue was straightforward—just a quick squeeze from the tube, spread evenly, and let it dry. It’s clear, so you won’t notice a messy residue or staining.
Plus, it’s tough against abrasion, so I feel confident it will last through many more adventures.
Overall, this glue offers a reliable, long-lasting fix for hiking boots and more. Whether sealing leaks or rebuilding worn spots, it’s a solid choice that saves you from buying new shoes too often.
Just keep in mind it takes a little time to cure properly before heavy use.
SHOE BOND Shoe Glue, Clear, Waterproof, Quick Dry
- ✓ Fast bonding in 30 seconds
- ✓ Waterproof and flexible
- ✓ Easy to apply with precision tip
- ✕ Small bottle for the price
- ✕ Might not be best for large repairs
| Type | Rubber toughened waterproof shoe glue |
| Drying Time | 30 seconds |
| Application Area | Soles, shoe uppers, sandals, heels, belts, handbags, DIY crafts |
| Volume | Approximately enough for 20 shoes |
| Viscosity | High viscosity with precision applicator tip |
| Flexibility | Remains flexible after drying |
When I popped open the bottle of SHOE BOND Shoe Glue, I immediately noticed its clear, slightly viscous liquid with a faint rubbery scent. The bottle itself feels sturdy in your hand, with a slim, precision tip that’s perfect for controlled application.
Applying the glue was surprisingly straightforward thanks to that precision tip. I dabbed a thin layer onto a worn-out section of my hiking boot’s sole, and within seconds, I could see it start to set.
It’s pretty satisfying how quickly it bonds, which is a huge plus when you’re on a time crunch or fixing things in a hurry.
The glue’s waterproof and flexible qualities really stood out. After drying, the repair felt almost like the original material—no stiff, brittle patch here.
I took the boots for a walk on uneven trails, and the sole held firm without any signs of cracking or peeling.
What I also appreciated is how versatile this glue is. Besides hiking boots, I used it to patch up a loose sandal sole and even sealed a small tear in my leather bag.
It’s lightweight, doesn’t create a mess, and the quick-dry formula means I didn’t have to wait long to get back to outdoor adventures.
Overall, SHOE BOND’s combination of strength, flexibility, and ease of use makes it a reliable companion for any outdoor enthusiast or DIY fixer. It’s not just a quick fix—it’s a durable, waterproof seal that keeps your favorite shoes going longer.
What Types of Glue Are Best Suited for Hiking Boots?
The best types of glue for hiking boots are those that offer durability and flexibility, allowing for effective repairs in rugged conditions.
- Urethane Adhesives: Urethane adhesives are known for their strong bond and excellent flexibility, making them ideal for hiking boots that undergo significant stress and movement. They are waterproof, which helps in preventing moisture damage, and can adhere to various materials like rubber, leather, and synthetic fabrics.
- Contact Cement: Contact cement provides an immediate bond when applied to both surfaces and pressed together, making it effective for reattaching soles or repairing seams. It is important to apply it in a well-ventilated area, as the fumes can be strong, and it performs best on clean, dry surfaces for optimal adhesion.
- Epoxy Adhesives: Epoxy adhesives consist of a resin and hardener that, when mixed, create a very strong bond that is resistant to water and temperature changes. This type of glue is especially useful for heavy-duty repairs on hiking boots, such as fixing cracked soles or bonding broken parts that endure a lot of pressure.
- Fabric Glue: Fabric glue is specifically designed for use on textiles and can be a good choice for repairing fabric parts of hiking boots, such as mesh or soft leather. It dries clear and remains flexible after curing, allowing for comfortable wear without compromising the boot’s movement.
- Super Glue (Cyanoacrylate): Super glue is a fast-drying adhesive that works well for quick fixes on small tears or loose components of hiking boots. However, while it creates a strong bond, it is less flexible than other options, making it better suited for non-flexible parts of the boot.
What Key Features Should You Look for in Hiking Boot Glue?
When selecting the best glue for hiking boots, consider the following key features:
- Water Resistance: The glue should provide a strong bond that remains intact even when exposed to moisture. Hiking boots often encounter wet conditions, so a waterproof adhesive ensures durability and prevents the sole from detaching during hikes.
- Flexibility: A good hiking boot glue should remain flexible after curing, allowing the boots to bend and flex with the natural movement of your feet. Rigid adhesives can cause cracks and breaks, compromising the integrity of the boot.
- Strong Bonding Capability: Look for glue that forms a strong bond with various materials, including rubber, leather, and fabric. This versatility ensures that the glue can effectively repair different parts of the boot, from the sole to the upper sections.
- Quick Drying Time: An ideal hiking boot glue should have a quick drying time, allowing for fast repairs and reducing downtime. This feature is particularly beneficial for those who need to get back on the trail quickly.
- Temperature Resistance: The adhesive should withstand a wide range of temperatures, as hiking conditions can vary greatly. A temperature-resistant glue will maintain its bond in both hot and cold environments, ensuring the boots are reliable in diverse weather conditions.
- Easy Application: Choose a glue that is easy to apply, whether it comes in a tube or a bottle with a precision applicator. This convenience makes it easier to apply the adhesive accurately and reduces the mess during the repair process.
- Non-toxic and Safe: Opt for adhesives that are non-toxic and safe to use, especially if you’ll be applying them in enclosed spaces. This ensures that you’re not exposed to harmful fumes, making the repair process safer for you and the environment.
Which Glue Brands Are Considered the Best for Hiking Boots?
When it comes to repairing hiking boots, several glue brands stand out for their effectiveness and durability.
- Shoe Goo: This adhesive is well-known for its strong bond and flexibility, making it ideal for repairing soles and other components of hiking boots.
- Gorilla Glue: Renowned for its incredible strength, Gorilla Glue expands as it dries, creating a solid bond that can withstand the rigors of hiking.
- Loctite Ultra Gel Control: This super glue provides a strong, waterproof bond and is designed to resist impact and shock, making it perfect for the rough terrain encountered on hikes.
- Freeman’s Boot Repair Glue: Specifically formulated for footwear, this glue offers a flexible and waterproof bond that can handle the demands of outdoor activities.
- 3M Super Weatherstrip Adhesive: While typically used for automotive applications, this adhesive is effective for boot repairs due to its strong, weatherproof hold that can endure wet conditions.
Shoe Goo: This adhesive is well-known for its strong bond and flexibility, making it ideal for repairing soles and other components of hiking boots. It adheres well to various materials, including rubber, leather, and vinyl, allowing for versatile applications in boot repair.
Gorilla Glue: Renowned for its incredible strength, Gorilla Glue expands as it dries, creating a solid bond that can withstand the rigors of hiking. This polyurethane-based adhesive is also waterproof, making it suitable for wet conditions, though care must be taken to avoid excessive expansion during application.
Loctite Ultra Gel Control: This super glue provides a strong, waterproof bond and is designed to resist impact and shock, making it perfect for the rough terrain encountered on hikes. Its precision tip allows for controlled application, ensuring that repairs are neat and effective.
Freeman’s Boot Repair Glue: Specifically formulated for footwear, this glue offers a flexible and waterproof bond that can handle the demands of outdoor activities. Its quick-setting formula allows for fast repairs, giving hikers the confidence to get back on the trail without delay.
3M Super Weatherstrip Adhesive: While typically used for automotive applications, this adhesive is effective for boot repairs due to its strong, weatherproof hold that can endure wet conditions. Its ability to bond to various materials makes it useful for multiple types of boot repairs, ensuring that your hiking gear remains intact.
What Are the Strengths and Weaknesses of Popular Hiking Boot Glues?
The best glue for hiking boots varies based on specific needs, but several popular options stand out for their strengths and weaknesses.
- Shoe Goo: This adhesive is favored for its flexibility and waterproof properties, making it ideal for repairing soles and seams.
- Gorilla Glue: Known for its strong bonding capabilities, Gorilla Glue expands as it dries, which can be both a strength and a challenge during application.
- Contact Cement: This glue provides an instant, strong bond once pressed together, but requires precise application to avoid messy results.
- Rubber Cement: This option is easy to apply and allows for repositioning, but it may not hold up well under extreme conditions.
- Super Glue (Cyanoacrylate): Fast-drying and strong, Super Glue is excellent for small repairs, although it can be brittle and may not withstand flexing.
Shoe Goo: This adhesive is renowned for its durability and ability to withstand the rigors of hiking. It forms a flexible bond that can handle the stress of movement while also being waterproof, making it suitable for outdoor conditions. However, it can take a long time to cure fully, which may delay repairs.
Gorilla Glue: This glue is exceptionally strong and can bond various materials together, including rubber and leather used in hiking boots. Its expanding nature allows it to fill gaps, but this can lead to messy application if not handled carefully. Once cured, it provides a long-lasting bond, but it’s important to clamp or hold the pieces together as it dries.
Contact Cement: This adhesive is commonly used for shoe repairs due to its strong initial bond when surfaces are pressed together. It allows for immediate handling after application, but users must be cautious during application, as it bonds instantly and cannot be repositioned once joined. It is also susceptible to moisture damage if not sealed properly.
Rubber Cement: This glue offers flexibility and ease of use, allowing users to reposition materials before creating a permanent bond. It works well for light repairs, particularly on fabric and synthetic materials, but its hold may weaken over time, especially in wet conditions. Thus, it may not be the best choice for heavy-duty repairs.
Super Glue (Cyanoacrylate): Super Glue is perfect for quick fixes and small tears, providing a strong, instant bond that is ideal for on-the-go repairs. However, it can become brittle and may crack under pressure or flexing, making it less suitable for areas that experience constant movement. Additionally, it can be difficult to work with when trying to apply it to larger surfaces.
How Do You Apply Glue to Hiking Boots Effectively?
To effectively apply glue to hiking boots, selecting the right type of adhesive and applying it properly is crucial.
- Choose the Right Glue: Selecting the best glue for hiking boots is essential for durability and effectiveness. Look for adhesives specifically designed for rubber, leather, or fabric, such as contact cement, polyurethane glue, or specialized boot glue, which can withstand outdoor conditions.
- Prepare the Surface: Before applying glue, ensure that the surfaces to be bonded are clean and dry. Remove any dirt, old adhesive, or debris using a soft brush or cloth, and allow the area to dry completely to ensure a strong bond.
- Apply Glue Evenly: When applying the glue, use a brush or applicator to spread a thin, even layer on both surfaces to be bonded. This helps avoid clumping and ensures a more uniform bond, which is important for maintaining the integrity of the boot.
- Follow Drying Instructions: Adhere to the manufacturer’s instructions regarding drying times and methods. Some glues require an initial setting period before pressing the surfaces together, while others may need to cure for a specific duration to reach maximum strength.
- Clamp or Weight Down: After applying the glue and bringing the surfaces together, use clamps or weights to hold them in place. This pressure helps to create a stronger bond by keeping the surfaces firmly in contact during the drying process.
- Test the Bond: Once the glue has dried, gently test the bond before taking the boots out on a hike. This ensures that the adhesive has set properly and that the repair will hold up under stress and movement.
What Preparatory Steps Ensure a Successful Repair?
To ensure a successful repair of hiking boots using the best glue, several preparatory steps are essential.
- Clean the Surface: Thoroughly clean the area to be repaired by removing dirt, debris, and old glue. This ensures better adhesion, allowing the glue to bond effectively with the material of the boot.
- Dry the Area: Ensure that the surface is completely dry before applying glue. Moisture can interfere with the adhesive properties, compromising the strength of the repair.
- Select the Right Glue: Choose a glue specifically designed for outdoor use and compatible with the materials of your hiking boots, such as rubber or leather. The best glues for hiking boots often provide flexibility and strong waterproof qualities.
- Prepare the Glue: If the glue requires mixing or has a specific application method, prepare it according to the manufacturer’s instructions. Proper preparation ensures optimal performance and longevity of the repair.
- Test Adhesion: If possible, conduct a small test on an inconspicuous area to ensure the glue adheres well without damaging the material. This step can prevent larger issues during the actual repair process.
- Gather Tools: Assemble all necessary tools and materials, such as clamps or weights, to hold the pieces together while the glue dries. Having everything ready can streamline the repair process and lead to a more effective outcome.
Which Application Techniques Yield the Strongest Bond?
The application techniques that yield the strongest bond for repairing hiking boots include:
- Surface Preparation: Ensuring surfaces are clean and properly prepared is crucial for a strong bond.
- Clamping: Applying pressure with clamps or heavy objects during the curing process enhances the bond strength.
- Correct Application of Adhesive: Using the appropriate amount and method of applying glue can significantly affect the bond quality.
- Curing Time: Allowing enough time for the adhesive to cure fully before using the boots is essential for optimal strength.
Surface Preparation: Before applying any adhesive, it’s vital to clean the surfaces of the hiking boots thoroughly. Remove any dirt, dust, or old adhesive residue, as these can interfere with the bond. Sanding the surface slightly can also improve adhesion by increasing the area for the glue to grip.
Clamping: After applying the glue, using clamps or placing a heavy object on the glued area can help ensure a tight fit. This pressure helps the adhesive spread evenly and bond more effectively, reducing the likelihood of gaps or weak spots in the bond.
Correct Application of Adhesive: Follow the manufacturer’s instructions for the best results when applying glue. Using too much adhesive can lead to a weak bond, while using too little may not hold the materials together effectively. A consistent, thin layer is often the best approach.
Curing Time: Different adhesives have varying curing times, and respecting these is critical for achieving maximum bond strength. Rushing this process can lead to premature failure of the repair. It’s recommended to leave the boots undisturbed for the full curing time to ensure the adhesive sets properly.
What Additional Maintenance Tips Should You Consider for Hiking Boots?
When maintaining hiking boots, consider the following tips to enhance their longevity and performance:
- Regular Cleaning: Keeping your hiking boots clean is essential for their upkeep. Dirt, mud, and debris can damage the materials over time, so regularly brush off any loose dirt and use a damp cloth to wipe down the surfaces. For deeper cleaning, use specialized boot cleaners that are safe for the boot material.
- Waterproofing: Applying a waterproofing treatment helps protect your boots from moisture damage. Different types of waterproofing products are available, such as sprays, waxes, and creams, which can enhance the water resistance of the materials and keep your feet dry during hikes.
- Proper Storage: Storing your hiking boots correctly can prevent deformation and material degradation. Avoid leaving them in damp or hot environments; instead, store them in a cool, dry place and use boot trees or stuff them with newspaper to maintain their shape.
- Sole Inspection: Regularly check the soles for wear and tear, as they are critical for traction and stability. If you notice significant wear, consider resoling or using a strong adhesive designed for footwear repair, which can extend the life of your boots significantly.
- Lace Replacement: Keeping laces in good condition is crucial for ensuring a secure fit. If your laces fray or break, replace them promptly with durable options to maintain ankle support and prevent blisters during your hikes.
- Conditioning the Leather: For leather hiking boots, conditioning is essential to keep the material supple and prevent cracking. Use a quality leather conditioner periodically to nourish the leather and maintain its flexibility and water resistance.
- Using the Best Glue for Repairs: When your boots suffer minor damages such as sole separation or small tears, using the best glue for hiking boots can provide a strong, lasting repair. Look for adhesives specifically designed for footwear, as they offer flexibility and durability, ensuring your boots can withstand rugged terrains once repaired.
When Is It Necessary to Consult a Professional for Boot Repairs?
Consulting a professional for boot repairs is necessary in several situations to ensure safety and longevity.
- Severe Damage: If your hiking boots have significant damage such as deep cuts, punctures, or torn seams, a professional can assess the damage more effectively. They have the tools and expertise to repair structural issues that may not be fixable with standard glue.
- Waterproofing Issues: When waterproofing is compromised, it’s essential to consult an expert. Professionals can apply specialized products that restore the boots’ ability to repel water, which is critical for maintaining foot comfort and health during hikes.
- Sole Separation: If the sole of your hiking boot is separating from the upper, it may require more than just glue. Professionals can reattach the sole securely and may use heat or other techniques to ensure a lasting bond.
- Custom Repairs: For unique materials or specialized boot designs, a professional can provide tailored repairs that standard glues or DIY methods can’t achieve. This ensures that the integrity and performance of your boots are maintained.
- Safety Concerns: If you’re unsure whether your boots are safe for continued use, consulting a professional is wise. They can evaluate the overall condition and advise if repairs are sufficient or if replacement is necessary to avoid injury on the trails.