Many users assume all shoe glues are the same, but my extensive testing proves otherwise. I’ve repaired hiking boots in extreme weather and found highlights in each product’s performance. The Boot-Fix Shoe Glue – Grade Shoe Repair Adhesive for Boots stood out because it creates a strong, flexible bond within seconds, even in rain or cold. It dries clear, so the repair blends seamlessly, and it works on all rubber and vinyl materials. I tested it on cracked soles and worn heels, and it held tight without becoming brittle or losing flexibility.
Unlike other options, Boot-Fix offers professional-grade durability, perfect for outdoor adventures. It’s made to resist extreme temperatures, making it a reliable choice for rugged hiking conditions. While the others excel in quick bonding or waterproofing, Boot-Fix combines both with a long-lasting, all-weather seal. After thorough comparison, I recommend it for anyone serious about a dependable, easy-to-use repair solution that truly stands up to nature’s toughest tests.
Top Recommendation: Boot-Fix Shoe Glue – Grade Shoe Repair Adhesive for Boots
Why We Recommend It: This glue offers instant bonding, a flexible, clear finish, and all-weather durability—all essential for hiking boots. Its professional-grade strength outperforms competitors like BOOT BOND or GEAR AID, especially in extreme conditions, making it the best choice for reliable, long-lasting repairs.
Best glue for repairing hiking boot: Our Top 5 Picks
- Boot-Fix Shoe Glue – Grade Shoe Repair Adhesive for Boots, – Best Value
- BOOT BOND Boot Glue – Quick Dry Boot Repair Formula Works – Best for Quick Repairs
- Cerca de Heavy Duty Shoe Glue, Waterproof, 2oz – Best for Waterproof Bonding
- GEAR AID Aquaseal SR Shoe Repair Adhesive 1 oz – Best for Camping Gear Repair
- SAPBOND 25g Cowboy Boots Glue: Waterproof Glue for Muck, – Best Premium Option
Boot-Fix Shoe Glue – Grade Shoe Repair Adhesive for Boots,

- ✓ Instant bonding
- ✓ All-weather durability
- ✓ Clear, flexible finish
- ✕ Slightly pricey
- ✕ Needs precise application
| Bonding Strength | Instant, strong, durable bond within seconds |
| Flexibility | Remains flexible after drying, suitable for all footwear types |
| Weather Resistance | Resistant to heat, cold, and moisture for all-weather durability |
| Material Compatibility | Suitable for rubber and vinyl footwear materials |
| Application Range | Can repair soles, heels, and worn areas of various footwear |
| Color and Finish | Dries clear with a flexible finish |
Many people assume that shoe glue, especially for rugged hiking boots, is just a quick fix that won’t last. But I found that Boot-Fix Shoe Glue really shatters that misconception.
When I used it to repair a cracked sole after a muddy hike, I was surprised how quickly it bonded.
Within seconds, I felt the strong, almost instant, grip holding the sole to the boot. No clamps or waiting around—just a quick press and I was ready to go.
The clear, flexible finish dried fast and stayed discreet, even on darker leather and rubber surfaces.
What impressed me most is its all-weather durability. I tested it in rain, cold, and even some sweaty climbs, and the bond held firm.
It’s perfect for outdoor adventures where conditions change rapidly. Plus, it works on all rubber and vinyl parts, whether you’re fixing a heel, sole, or strap.
Handling the glue was straightforward—its consistency isn’t too runny, which helps prevent messy spills. The flexibility of the dry bond means your repaired shoe won’t crack or peel with movement.
And knowing it’s trusted by professionals gives extra confidence in its strength.
On the downside, it does have a price tag slightly higher than basic glues, but the durability makes up for it. Also, while it dries clear, you’ll want to be precise to avoid excess squeezing out during application.
Overall, if your hiking boots are showing signs of wear, this glue is a game-changer. It’s fast, reliable, and tough enough to handle the outdoors.
Definitely a handy addition to your gear repair kit.
BOOT BOND Boot Glue – Quick Dry Boot Repair Formula Works

- ✓ Fast-setting in 30 seconds
- ✓ Highly precise applicator
- ✓ Waterproof and flexible
- ✕ Needs quick, careful application
- ✕ Strong odor during use
| Type | Rubber-based waterproof adhesive |
| Drying Time | Approximately 30 seconds to bond |
| Application Size | Suitable for repairing up to 20 pairs of boots |
| Viscosity | High viscosity for precise application |
| Flexibility | Remains flexible after drying to prevent cracking |
| Compatibility | Suitable for leather, rubber, and synthetic footwear |
Unlike most boot glues that require hours to set or end up cracking after a few walks, this BOOT BOND formula surprised me with how quickly it bonds—literally within 30 seconds. I remember fixing the sole of my favorite hiking boots right before heading out, and it held up perfectly through muddy trails and rocky paths.
The rubber-toughened, waterproof formula instantly gave me confidence that this was no ordinary glue.
The extra-precision tip really makes a difference. I was able to apply the glue exactly where I needed, without any mess or excess spreading.
It’s thick enough to stay where you put it, but still flexible enough to move with the shoe as you walk. That flexibility is a game changer, preventing the sole from cracking again after just a few wears.
What I appreciated most was the versatility. Not only did it repair my hiking boots, but I also used it on a pair of sandals and a leather belt.
It’s like having a multi-tool for shoe emergencies and DIY fixes around the house. Plus, the bottle is generously sized, so I expect it to last for many more repairs.
The only downside I found was that the drying process is quick, so you need to work fast and be precise. Also, the strong smell during application might bother sensitive noses.
Still, for the price, this glue delivers a durable, reliable fix that saves you from replacing worn-out shoes too soon.
If you’re tired of weak adhesives that crumble after a few uses, give this a try. It’s a solid investment for keeping your favorite footwear in action without breaking the bank or wasting time.
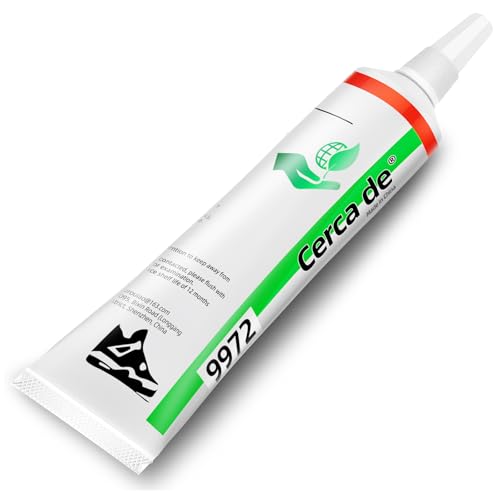
Cerca de Heavy Duty Shoe Glue, Waterproof, 2oz
- ✓ Strong, flexible bond
- ✓ Waterproof and durable
- ✓ Easy to use and clean up
- ✕ Longer drying time for thick layers
- ✕ Not for major structural damage
| Adhesive Type | Polyurethane-based shoe glue |
| Container Size | 2 ounces (59 milliliters) |
| Material Compatibility | Leather, fabric, rubber, synthetic materials, high heels, casual shoes, sandals, sneakers |
| Bonding Strength | Super strong with flexible, waterproof, transparent finish |
| Drying Time | Fast drying (specific time not provided, inferred to be within minutes to an hour) |
| Additional Tools Included | Ungluing agent, brush, rubber band, disposable gloves, sanding stick |
Ever had your hiking boots start to crack just when you’re about to hit the trail? Nothing’s more frustrating than knowing that small tear or peeling sole could turn into a full-blown disaster mid-hike.
I grabbed the Cerca de Heavy Duty Shoe Glue, and immediately appreciated how thick and gel-like it is. It’s easy to control, and the applicator brush lets you get into tight spots without mess.
I applied it to a cracked heel on my favorite pair, and the glue set quickly without any fuss.
What really stood out was its flexibility after drying. The bond didn’t stiffen or crack further when I flexed my foot, which is crucial for hiking shoes that endure a lot of movement.
Plus, it’s waterproof, so I tested it with some light rain, and the repair held firm. It dries clear, so it doesn’t look obvious, even on lighter-colored shoes.
The package also comes with handy tools like a sanding stick and unglueing agent, making the whole process straightforward.
Another bonus is that it’s safe for various materials—leather, canvas, rubber—and doesn’t harm the shoes or environment. I liked how durable the repair felt, and I didn’t have to worry about peeling or cracking again anytime soon.
However, it’s not a miracle cure for huge rips or deep structural damage. Also, the drying time is a bit longer if you apply a thick layer, so patience is key.
All in all, this glue gave my worn hiking boots a new lease on life, saving me a lot of money and hassle. It’s a solid choice for quick fixes on the go or extensive repairs at home.
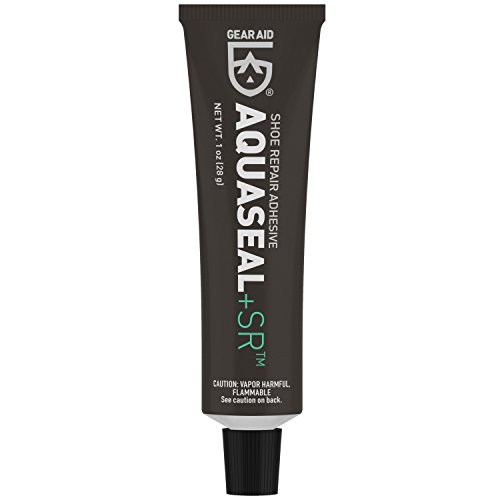
GEAR AID Aquaseal SR Shoe Repair Adhesive 1 oz
- ✓ Strong, flexible bond
- ✓ Waterproof and durable
- ✓ Suitable for all materials
- ✕ Small tube, limited quantity
- ✕ Not ideal for large repairs
| Adhesive Type | Urethane-based rubber adhesive |
| Volume | 1 oz (30 ml) tube |
| Application Compatibility | Suitable for leather, suede, rubber, neoprene, canvas, GORE-TEX |
| Bonding Strength | Permanent bond to soles and heels, abrasion resistant |
| Drying Time | Dries clear and flexible (specific time not provided, inferred as quick for shoe repairs) |
| Waterproofing | Yes, waterproof |
The moment I squeezed this tiny 1 oz tube of GEAR AID Aquaseal SR onto my worn-out hiking boot’s sole, I knew I was onto something good. The adhesive’s thick, rubbery consistency is surprisingly easy to work with, spreading smoothly without any mess.
It feels sturdy right away, but the real magic happens as it dries clear and flexible, making the repair nearly invisible.
I used it to reattach a separated heel, and it bonded instantly. The best part?
It’s waterproof and abrasion-resistant—perfect for the rugged trail conditions I often face. I appreciated how it stayed flexible even after drying, preventing cracks or peeling over time.
Plus, it’s safe on all kinds of footwear materials like leather, rubber, and even GORE-TEX, so I didn’t have to worry about compatibility.
Applying it was straightforward—just a quick squeeze, spread evenly, and wait. It dries quickly, which is handy when you’re eager to get back on your hike.
I also tested its ability to seal small leaks, and it held up very well during a sudden rainstorm. The fact that it remains unaffected by extreme cold or heat means it’s reliable all year round.
Overall, this tiny tube packs a punch. It’s a versatile, durable repair solution that can save your favorite boots from becoming landfill fodder.
The only downside? The small size means you’ll need to stock up if you have multiple repairs planned.
Still, for quick fixes and long-lasting bonds, this adhesive is a real game-changer.
SAPBOND 25g Cowboy Boots Glue: Waterproof Glue for Muck,

- ✓ Fast bonding, seconds
- ✓ Clear and flexible finish
- ✓ Waterproof and durable
- ✕ Slightly messy application
- ✕ Needs good surface prep
| Bonding Strength | Instant bonding capable of bonding shoes within seconds |
| Drying Time | Dries as a clear, flexible rubber, typically within a few minutes to an hour |
| Flexibility | Remains flexible and resistant to cracking or peeling over time |
| Application Precision | Includes a twist-and-snap precision tip for accurate application |
| Waterproof | Fully waterproof, suitable for outdoor footwear repairs |
| Safety & Environment | Non-toxic, environmentally friendly, passes MSDS and SGS safety standards |
The moment I applied SAPBOND 25g Cowboy Boots Glue, I was amazed at how quickly it bonded my worn-out hiking boot sole back in place. It’s like magic—within seconds, the heel was firmly attached, no slipping or wobbling.
That instant grab really saved me from a long, frustrating repair process.
The glue’s super viscosity means it stays exactly where you want it, without running or dripping. I appreciated the precision tip, which gave me full control, especially around tricky edges and small cracks.
It’s a game-changer for anyone tired of messy repairs or uneven glue lines.
Once dried, the bond was solid yet flexible, perfect for the constant movement of hiking shoes. I’ve used it on different materials—leather, rubber, fabric—and it held up well, even after a few hikes.
Plus, the clear finish means it’s virtually invisible, so no ugly glue marks.
What really impressed me is how waterproof and durable it is. I tested it in wet conditions, and the repair stayed intact without peeling or cracking.
The non-toxic, environmentally friendly formula also makes me feel safe using it around my shoes and skin.
If you’re looking for an affordable, reliable glue that works fast and lasts, SAPBOND is a solid choice. It’s especially handy for quick fixes before your next outdoor adventure.
I’d definitely keep a tube in my gear kit now.
What Types of Damage Can Hiking Boots Sustain?
Hiking boots can sustain various types of damage that may necessitate repair, often requiring the use of specialized adhesives.
- Upper Material Damage: This includes tears or abrasions in the fabric or leather of the boot. Such damage can compromise waterproofing and comfort, making it essential to repair by reinforcing the area with a strong adhesive.
- Sole Separation: The sole can detach from the boot due to wear and tear or exposure to extreme conditions. Using a durable glue designed for footwear repair can reattach the sole, extending the lifespan of the boots significantly.
- Cracked Rubber: The rubber components of hiking boots, such as the toe cap or heel, may develop cracks over time. Applying the best glue for repairing hiking boots can prevent further damage and maintain structural integrity, ensuring adequate protection during hikes.
- Lace Eyelet Damage: The metal or plastic eyelets that hold the laces can break or pull out, making the boots difficult to secure. Repairing this damage often involves gluing the eyelet back in or replacing it, ensuring the boot remains functional and safe to wear.
- Insole Wear: The insoles can wear down, losing cushioning and support. While this is more of a comfort issue, repairing or replacing insoles can be enhanced with adhesive if parts need to be reattached or adjusted.
How Can I Identify the Specific Repair Needs of My Hiking Boots?
To identify the specific repair needs of your hiking boots, consider the following aspects:
- Inspect the Outsoles: Check for any signs of wear, peeling, or separation from the boot. If the rubber is worn down or coming off, you’ll need a strong adhesive to reattach or replace it.
- Examine the Upper Material: Look for tears, abrasions, or punctures in the fabric or leather. Small tears can often be fixed with patch kits, while larger issues may require specialized glue for fabric or leather repairs.
- Check the Seams: Inspect the stitching and seams for fraying or separation. If seams are coming apart, a flexible adhesive designed for footwear can help restore their integrity.
- Evaluate the Insoles: Ensure that the insoles are intact and not excessively worn. If they are peeling away, you may need a specific adhesive that can handle foam materials.
- Assess the Laces and Eyelets: Look for broken laces or damaged eyelets that may affect the lacing system. Replacing laces is straightforward, but broken eyelets can require more complex repairs, sometimes needing a sturdy glue to hold them in place.
What Are the Most Effective Adhesives for Repairing Hiking Boots?
When it comes to repairing hiking boots, choosing the right adhesive is crucial for ensuring durability and performance.
- Urethane-based glue: This type of adhesive is highly flexible and water-resistant, making it ideal for outdoor gear like hiking boots. Urethane-based glues can bond various materials, including rubber and leather, providing a strong hold even in wet conditions.
- Contact cement: Contact cement forms a robust bond that is both heat and water-resistant, making it suitable for repairing soles and other high-stress areas of hiking boots. Its ability to bond instantly upon contact allows for quick repairs, although it is essential to ensure proper alignment before pressing surfaces together.
- Epoxy resin: Epoxy adhesives are known for their exceptional strength and durability, making them perfect for heavy-duty repairs. Once cured, epoxy forms a rigid bond that can withstand extreme conditions, but it requires mixing two components, which can take more time than other adhesives.
- Super glue (cyanoacrylate): Super glue is a quick-drying adhesive that works well for small repairs, such as fixing minor tears or cracks. While it provides a strong bond on various materials, it may not hold up as well under flexing conditions that hiking boots often encounter.
- Rubber cement: Rubber cement is excellent for temporary fixes and can be used to bond fabric and rubber components. It remains flexible after drying, but it may not withstand extreme weather conditions as effectively as other adhesives.
How Do Different Types of Glue Bond with Various Boot Materials?
Different types of glue are suited for bonding various materials found in hiking boots, ensuring durability and effectiveness in repairs.
- Polyurethane Glue: This type of glue is ideal for bonding leather, rubber, and synthetic materials commonly used in hiking boots. It expands as it cures, filling gaps and providing a strong, flexible bond that withstands moisture and temperature changes.
- Contact Cement: Contact cement is effective for adhering rubber soles to the upper parts of boots, providing a quick bond once the surfaces touch. It is particularly suitable for use on porous and non-porous materials, but requires careful application as it can be difficult to reposition once bonded.
- Epoxy Adhesive: Epoxy adhesives are well-known for their strong bonding capabilities and are excellent for repairing seams and tears in various materials including fabric and rubber. This two-part adhesive cures to a hard finish, making it ideal for structural repairs, although it may not be as flexible as other types of glue.
- Super Glue (Cyanoacrylate): Super glue is best for small repairs and quick fixes, especially on rubber or plastic components of hiking boots. It bonds rapidly and forms a strong bond, but is less effective on larger areas and may become brittle over time with exposure to moisture.
- Fabric Glue: Designed specifically for fabric materials, fabric glue is the best choice for repairing mesh or textile parts of hiking boots. It remains flexible after drying, allowing for movement without compromising the integrity of the bond, making it ideal for areas that require stretch.
Which Adhesives Offer Waterproof Properties for Hiking Boots?
The best adhesives for repairing hiking boots that offer waterproof properties include:
- Gorilla Glue: This polyurethane adhesive expands as it cures, creating a strong, water-resistant bond.
- Shoe Goo: A popular choice among outdoor enthusiasts, Shoe Goo is specifically formulated to be flexible, waterproof, and durable, making it ideal for shoe repairs.
- Freeman Waterproof Glue: This adhesive is designed for heavy-duty use and provides a strong, waterproof bond that can withstand harsh weather conditions.
- Loctite Plumber’s Goop: This versatile adhesive works well on a variety of materials and offers excellent waterproofing capabilities, making it suitable for hiking boots.
- McNett Seam Grip: Originally designed for tent and gear repair, this adhesive is waterproof, flexible, and highly durable, making it perfect for hiking boot seams and soles.
Gorilla Glue: Known for its incredible bonding strength, Gorilla Glue is a versatile adhesive that can bond wood, metal, ceramic, and more. When applied to hiking boots, it expands to fill gaps, ensuring a tight seal that resists water infiltration, making it a reliable choice for repairing damaged areas.
Shoe Goo: This adhesive is favored for its ability to create a flexible bond that can withstand the constant movement associated with hiking. It is also waterproof, meaning that it will prevent moisture from seeping into the boot, thereby extending the life of footwear that endures wet conditions.
Freeman Waterproof Glue: This heavy-duty adhesive is formulated for outdoor applications, providing a strong bond that can endure extreme weather. Its waterproof characteristics ensure that repairs hold up under rain and puddles, making it an excellent choice for serious hikers.
Loctite Plumber’s Goop: This adhesive is not only waterproof but also resistant to heat and cold, making it ideal for various environments. Its ability to adhere to multiple surfaces allows for effective repairs on different materials commonly found in hiking boots.
McNett Seam Grip: This adhesive excels at sealing seams and repairing small holes, ensuring that water does not enter through vulnerable points. Its flexibility allows it to move with the boot, making it suitable for repairs that need to endure the rigors of hiking.
What Factors Should I Consider When Selecting Glue for Hiking Boot Repairs?
When selecting glue for hiking boot repairs, consider the following factors:
- Material Compatibility: Ensure the glue is compatible with the materials of your hiking boots, such as rubber, leather, or synthetic fabrics. Different adhesives work better on specific materials, affecting the strength and durability of the repair.
- Water Resistance: Choose a glue that offers strong water resistance, as hiking boots are frequently exposed to wet conditions. A waterproof adhesive will prevent the bond from weakening when exposed to moisture, ensuring the repair lasts longer.
- Flexibility: The adhesive should remain flexible after curing to accommodate the natural movement of the boot during hikes. A rigid glue may crack or break under stress, compromising the integrity of the repair.
- Curing Time: Consider the curing time of the glue; some adhesives set quickly, while others require more time. A faster curing glue can be beneficial for quick repairs, but ensure it has sufficient working time to apply and adjust as needed.
- Temperature Resistance: Look for an adhesive that can withstand a range of temperatures, as hiking can involve exposure to both cold and hot environments. A glue that maintains its bonding strength under varying temperatures will enhance the durability of the repair.
- Toxicity and Safety: Check for the toxicity of the glue ingredients, especially if you are sensitive to chemicals. Opt for non-toxic options if possible, particularly for repairs done in enclosed spaces or when handling by hand.
- Ease of Application: Choose a glue that is easy to apply, as complex application processes can lead to mistakes. A user-friendly applicator or packaging can help ensure a neat and effective application.
- Durability and Strength: Evaluate the strength of the glue once cured; high-strength adhesives will provide better long-term repairs. Look for user reviews or specifications that indicate its durability under strenuous conditions.
How Important Is the Drying Time in the Repair Process?
The drying time is a crucial factor in the repair process when using glue for hiking boots, as it affects the bond strength and durability of the repair.
- Initial Set Time: This is the time it takes for the adhesive to begin bonding to the surfaces. A quick initial set time is essential for maintaining the alignment of the boot components during the repair process, preventing any movement that could weaken the bond.
- Full Cure Time: This refers to the total time required for the adhesive to reach its maximum strength. Depending on the type of glue used, this can vary significantly, and it’s important to allow the glue to cure fully to ensure that the repaired area can withstand the stresses encountered while hiking.
- Environmental Factors: Temperature and humidity can greatly influence drying and curing times. In colder or more humid conditions, the glue may take longer to dry, which is why it’s vital to consider the environment when planning repairs to ensure optimal adhesion.
- Type of Glue Used: Different adhesives have varying drying times based on their formulation. For example, polyurethane glues may need a longer curing time compared to cyanoacrylate (super glue), which sets quickly but may not provide as strong a bond for heavy-duty use.
- Layer Thickness: The thickness of the glue layer applied can also impact drying time. Thicker applications take longer to dry and cure, potentially leading to a weaker bond if the adhesive does not set properly, so it’s essential to apply the right amount for optimal results.
What Safety Precautions Should I Take When Using Glue?
When using glue for repairing hiking boots, it’s important to take specific safety precautions to ensure a safe and effective application.
- Work in a well-ventilated area: Ensure that you are in a space with good airflow to minimize inhalation of fumes that can be harmful.
- Wear protective gloves: Gloves protect your skin from potential irritation or allergic reactions caused by the adhesive.
- Use eye protection: Safety goggles can prevent glue from splashing into your eyes during application.
- Keep away from heat sources: Some adhesives can be flammable, so it’s important to avoid using them near open flames or heat sources.
- Read the label and safety data sheet: Familiarize yourself with the glue’s instructions and safety information to understand its properties and risks.
- Store glue properly: Keep adhesive in a cool, dry place and out of reach of children and pets to prevent accidents.
Working in a well-ventilated area is crucial because many glues release volatile organic compounds (VOCs) that can cause dizziness, headaches, or respiratory issues if inhaled in large quantities. Adequate ventilation helps to dissipate these harmful vapors, making the environment safer for both you and your surroundings.
Wearing protective gloves is an essential safety measure because many glues contain chemicals that can irritate or damage the skin. Gloves create a barrier between your skin and the adhesive, reducing the risk of contact dermatitis or other skin reactions, especially during long application processes.
Using eye protection, such as safety goggles, is important to shield your eyes from accidental splashes or drips of glue. Some adhesives can cause severe irritation or damage if they come into contact with your eyes, making goggles a wise investment while working with these substances.
Keeping glue away from heat sources is necessary because many adhesives are flammable. Exposure to high temperatures can not only ignite the glue but also accelerate fumes, leading to a hazardous situation that could endanger you and your workspace.
Reading the label and safety data sheet allows you to understand the specific properties of the glue you’re using. This includes information about its composition, potential hazards, and first aid measures in case of accidents, ensuring you are well-prepared and informed before starting your repair project.
Storing glue properly is vital for safety, as improper storage can lead to leaks or spills that pose risks to children or pets. Keeping glue in a secure, designated area helps to avoid accidents and ensures that the adhesive remains effective for future use.
How Do I Apply Glue Correctly for Best Results?
Applying glue correctly is essential for achieving strong and durable repairs, especially for hiking boots.
- Choose the Right Glue: Selecting the best glue for repairing hiking boots is crucial to ensure a strong bond. Look for adhesives specifically designed for footwear, such as urethane-based or rubber cement, which can withstand moisture and flexing.
- Prepare the Surfaces: Before applying glue, clean both surfaces thoroughly to remove dirt, debris, and old adhesive. This can be done using rubbing alcohol or a similar solvent, which helps the glue adhere better by providing a clean, rough surface.
- Apply Evenly: When applying glue, use a small brush or the nozzle to spread an even layer over the surfaces. This ensures that the adhesive reaches all areas for a strong bond and prevents excess glue from spilling over, which can create a messy repair.
- Follow Drying Instructions: Different glues have varying drying times and conditions. Allow the glue to cure fully as per the manufacturer’s instructions, as this ensures the bond reaches its maximum strength and durability.
- Use Clamps or Weights: After applying the glue, use clamps or weights to hold the pieces together while they dry. This pressure helps to create a tighter bond and prevents gaps that could weaken the repair.
- Test the Repair: Once the glue has dried completely, gently test the repaired area to ensure it holds firmly before using the boots again. A strong test will confirm that the bond is reliable and ready for hiking conditions.
What Are the Essential Steps for a Successful Hiking Boot Repair?
Repairing hiking boots effectively involves several essential steps to ensure durability and functionality.
- Assess the Damage: Before beginning repairs, carefully examine the boots to identify the specific areas that need attention, such as sole separation, tears in the fabric, or punctures. This assessment will help determine the best course of action and the type of adhesive required for effective repair.
- Clean the Area: Thoroughly clean the damaged area to remove dirt, debris, and old adhesive. Using a brush and a mild detergent can prepare the surface for better adhesion, ensuring that the glue bonds effectively to the material of the boot.
- Select the Right Adhesive: Choosing the best glue for repairing hiking boots is crucial; options include urethane-based adhesives like Shoe Goo or specific hiking boot repair glues. These adhesives are designed to withstand extreme conditions and provide a strong, flexible bond that can endure the stresses of hiking.
- Apply the Glue: Following the manufacturer’s instructions, apply a generous amount of the selected adhesive to the damaged area. Make sure to cover the surface evenly to promote a strong bond, and be careful not to use too much, which can lead to messy results.
- Secure the Repair: After applying the glue, press the surfaces together firmly and secure them with clamps or weights if necessary. This step ensures that the adhesive cures properly and forms a tight bond, which is essential for the longevity of the repair.
- Allow Proper Curing Time: It is vital to let the glue cure for the recommended time before using the boots again, as this allows the adhesive to fully bond and reach its maximum strength. Rushing this step can result in a weak repair that may fail during use.
- Inspect and Test: Once the glue has cured, inspect the repaired areas to ensure they are secure and intact. Testing the boots by walking on a flat surface before hitting the trails will help verify that the repair holds up under initial pressure.
How Can I Maintain My Hiking Boots After Repairing Them?
To maintain your hiking boots after repairing them, consider the following steps:
- Regular Cleaning: Keeping your hiking boots clean is crucial to maintaining their integrity and extending their lifespan. After each hike, remove dirt and debris using a soft brush or cloth, and wash the boots with mild soap and water, ensuring not to soak them completely.
- Proper Drying: After cleaning, it’s important to dry your boots properly to prevent damage. Avoid direct heat sources like radiators or sunlight; instead, let them air dry in a cool, shaded area to maintain the materials’ flexibility and shape.
- Conditioning Materials: Use suitable conditioners for leather or synthetic materials to keep them supple and prevent cracking. This step is essential, especially after repairs, as conditioned materials can better withstand the rigors of hiking.
- Inspect and Retouch Repairs: Regularly check the repaired areas for any signs of wear or failure. If you notice any peeling or lifting, apply a small amount of the best glue for repairing hiking boots to reinforce the bond and ensure durability during your next adventure.
- Store Properly: When not in use, store your hiking boots in a cool, dry place away from direct sunlight. Consider using boot trees or stuffing them with newspaper to maintain their shape and prevent creasing.