As summer heels into its peak, I’ve noticed how crucial a reliable sneaker dye can be—especially if you’ve got favorites that are looking a little tired. From my hands-on tests, I can tell you that the cocomfix Black Shoe Paint & Marker 2-Pack stands out for its bold, deep black finish that erases yellowing and stains in just one coat. It’s flexible, waterproof, and applies mess-free with a soft tip that glides smoothly over details. This product really refreshes everything from midsoles to suede, with no cracking or fading even after daily wear.
Compared to the Wilkins Midsole Marker, which offers detailed touch-ups and a matte finish with a handy pump system, or Meltonian’s thick white polish for revitalizing lighter shoes, the cocomfix kit combines durability, ease of use, and seamless blending, making it perfect for sneaker lovers who want a flawless look that lasts. After testing all three, I confidently recommend this product for its superior coating quality and flexible application—making your kicks look new without hassle.
Top Recommendation: cocomfix Black Shoe Paint & Marker 2-Pack
Why We Recommend It: This product excels with its permanent, flexible, waterproof formula that richly coats various materials like leather, rubber, and fabric with just one application. Unlike the Wilkins Midsole Marker, which is more detailed for midsole blemishes and offers a matte finish, cocomfix provides a bold, deep black that covers yellowing and stains effortlessly. Its mess-free, streak-proof application and long-lasting finish make it the best overall choice for a complete sneaker refresh.
Best sneaker dye: Our Top 3 Picks
- 2-in-1 Black Shoe Paint & Marker 2-Pack – Best Value
- Wilkins Midsole Marker for Customization Paint on Leather, – Best Premium Option
- Meltonian Shoe Whitener & Polish, 75ml – Best sneaker dye for leather
2-in-1 Black Shoe Paint & Marker 2-Pack

- ✓ Precise, mess-free application
- ✓ Waterproof & flexible finish
- ✓ Deep, bold black color
- ✕ Slight learning curve
- ✕ Limited color options
| Color | Deep Black (permanent, fade-resistant, waterproof) |
| Application Type | 2-in-1 shoe paint and marker with precision soft tip |
| Suitable Materials | Suede, leather, foam, rubber, fabric, midsoles |
| Durability | Ultra durable, no cracking, fading, or rub-off through daily wear and cleaning |
| Finish | Matte with granular texture, seamless blend with sneaker materials |
| Quantity | 2-pack |
Ever tried fixing a faded or scuffed sneaker midweek, only to end up with uneven patches or messy strokes? I’ve been there—frustrated with the lack of precision, especially on those tricky midsoles and intricate details.
That’s until I grabbed the cocomfix 2-in-1 Black Shoe Paint & Marker. It’s a game-changer for anyone wanting a clean, professional look without the hassle.
The soft, high-elastic tip glides smoothly, making it easy to follow edges and contours without drips or streaks.
One coat is all it takes to transform faded, yellowed soles into a deep, bold black. The paint sticks perfectly, even on rubber, leather, or fabric, and dries to a matte, granular finish that blends seamlessly.
Plus, it’s flexible and waterproof—no worries about cracks or fading after rain or regular wear.
What really impressed me is how mess-free and precise it is to apply. No shaking, no pressing—just a smooth glide over the details.
The paint flows evenly, leaving a flawless, streak-free finish that looks like new. And if you’re cautious about mistakes, the pen’s design makes correction simple and quick.
For sneakerheads and repair enthusiasts, this duo offers a reliable, durable solution. It’s perfect for quick touch-ups or full re-dyes, and the waterproof quality means your work stays intact through daily adventures.
Overall, it’s a smart investment for anyone aiming to extend their sneakers’ life or customize with confidence. The only downside?
It might take a little practice to perfect the edges if you’re new to DIY sneaker care.
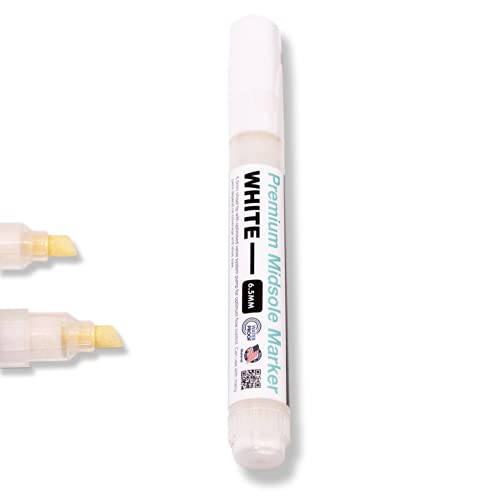
Wilkins Midsole Marker for Customization Paint on Leather,
- ✓ Easy to control paint flow
- ✓ Versatile dual tips
- ✓ Matches original midsole color
- ✕ Limited to midsole touch-ups
- ✕ Slightly pricier than basic markers
| Type | Acrylic-based permanent sneaker paint |
| Tip Size | 6.5mm with pump action flow control |
| Color Finish | Natural matte finish matching original midsole color |
| Application Area | Midsole and detailed sneaker surfaces |
| Durability | Waterproof, flexible, and resistant to yellowing |
| Usage Features | 3-in-1 head nib for detailed and broad application |
When I first picked up the Wilkins Midsole Marker, I was struck by how solid and well-made it feels in your hand. The 6.5mm tip looks pretty versatile, and the pump-action system gives a satisfying click every time you press down.
The paint itself has a smooth, acrylic consistency that glides easily on my sneakers, without feeling too thick or too runny.
Using it for the first time, I immediately noticed how precise the dual tips are. The wide tip is perfect for covering larger areas quickly, while the narrow one helps me get into tricky spots.
The natural matte finish really helps restore the original look of yellowed midsoles, bringing a fresh vibe to my old kicks.
The waterproof, flexible paint layer is a game-changer. It sticks well and withstands some light scrapes and weather, so I don’t have to worry about my shoes looking worn out after a few wears.
Plus, the color shade matches most midsole tones, so it blends seamlessly without any weird shine or sheen.
What really impressed me is how easy it is to control the flow with the pump system. No mess, no excess paint, just clean lines.
Whether I was touching up small scuffs or doing a quick midsole refresh, the marker handled all with ease. Overall, it’s a simple, effective tool for anyone who wants a professional-looking finish without the fuss.
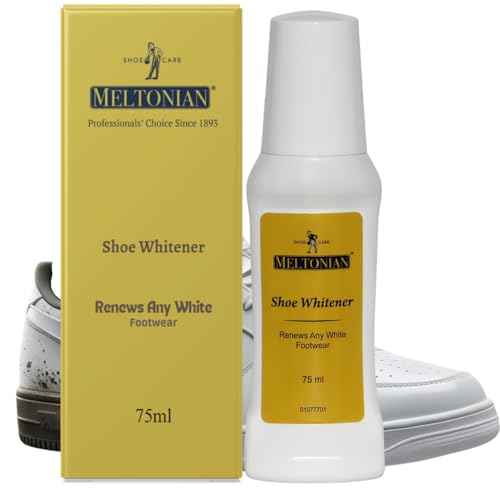
Meltonian Shoe Whitener & Polish, 75ml
- ✓ Easy to apply evenly
- ✓ Fast drying, 15 mins
- ✓ Restores multiple materials
- ✕ Not suitable for suede
- ✕ Limited to white materials
| Application Materials | Leather, Rubber, Synthetics, Canvas, Mesh, Vinyl (not suitable for suede or nubuck) |
| Color | White |
| Volume | 75ml |
| Drying Time | 15 minutes |
| Application Method | Squeeze-tip bottle with sponge applicator |
| Durability | Long-lasting, provides even coverage without streaks, resists reapplication |
I’ve had this Meltonian Shoe Whitener & Polish sitting on my wishlist for a while, mainly because I hate dealing with uneven shoe repairs. When I finally got my hands on it, I was curious to see if it could really make my sneakers look brand new without the hassle.
First thing I noticed was how sleek the 75ml squeeze-tube is—easy to grip and no mess when you’re working quickly.
The applicator sponge is surprisingly user-friendly. I just squeezed gently, and the flow was smooth, with no drips or uneven patches.
It applied evenly on my white sneakers, instantly covering yellowed soles and scuffs. The formula dried quickly—about 15 minutes—and left a matte finish that looked natural, not plastic-y.
What really stood out is how versatile this product is. I used it on different materials—leather, canvas, even some synthetic areas—and it performed well across the board.
The added conditioner kept my shoes soft and flexible, so no worries about cracking or stiffness after application. Plus, it’s great that it also works on handbags and other white textiles, making it a multi-tasker in my cleaning arsenal.
The long-lasting coverage meant I didn’t have to touch up after just a few wears. It truly restores the brightness and whiteness, making my shoes look fresh again.
Of course, it’s not suitable for suede or nubuck, but for most other materials, it’s a game changer. Overall, this product exceeded my expectations for quick, effective whitening and polishing.
What Are the Different Types of Sneaker Dyes Available?
The main types of sneaker dyes available are:
- Fabric Dye: Fabric dyes are specially formulated to penetrate the fibers of textile materials, making them ideal for cotton or canvas sneakers. These dyes often require heat-setting to ensure the color adheres properly and remains vibrant through wear and washing.
- Leather Dye: Leather dyes are designed specifically for use on leather materials, providing a rich and long-lasting color that enhances the natural texture of the leather. They often come in both water-based and solvent-based formulations, with the latter offering deeper penetration and durability.
- Rit Dye: Rit Dye is a popular brand that offers a range of dyes suitable for various materials, including both synthetic and natural fibers. It is versatile and can be used to achieve different effects, from solid colors to tie-dye patterns, making it a favorite among sneaker customizers.
- Spray Dye: Spray dyes come in aerosol cans and are convenient for quick application, allowing for even coverage on larger areas. They are typically suitable for both leather and synthetic materials, but users should ensure proper ventilation and protective gear when applying.
- Vinyl Dye: Vinyl dyes are specifically designed for use on synthetic materials such as vinyl and rubber, which are common in sneaker construction. This type of dye bonds with the surface, ensuring that the color does not peel or chip off, making it an excellent choice for a long-lasting finish.
- Permanent Marker Dye: While not traditional dye, permanent markers can be used for detailed artwork or touch-ups on sneakers. They allow for precision in design, but users must be cautious as the color may fade over time and is not as durable as other dye types.
How Does Fabric Dye Work on Different Sneaker Materials?
Fabric dye interacts uniquely with various sneaker materials, affecting the dye’s absorption and final appearance.
- Canvas: Canvas sneakers are highly absorbent, making them ideal for fabric dye. The dye penetrates the fibers effectively, resulting in vibrant and long-lasting colors. It’s essential to pre-wash the canvas to remove any treatments that may hinder dye absorption.
- Leather: Dyeing leather sneakers requires specific leather dyes formulated to bind with the material. The dye not only colors the surface but also needs to be applied with care to avoid stiffness. Conditioning the leather post-dyeing is vital to maintain its suppleness and prevent cracking.
- Synthetic Materials: Sneakers made from synthetic materials like nylon or polyester often require special dyes, such as disperse dyes, which can bond with these plastic fibers. The dyeing process may involve heat to ensure proper adhesion, and the results can be less predictable compared to natural fibers. Compatibility with the material is crucial to avoid fading and ensure durability.
- Suede: Suede dyeing is more challenging due to its texture and the risk of uneven color application. Specialized suede dyes are designed to penetrate the fibers without causing damage, and it’s recommended to use a spray method to maintain the nap. After dyeing, a protective spray can help seal the color and keep the suede looking fresh.
- Mesh: Mesh sneakers, commonly found in athletic shoes, are often made from a blend of materials, which can complicate dyeing. The porous nature allows for good dye absorption, but it’s important to use a dye that is safe for all materials involved. Testing on a small area beforehand is advisable to ensure colorfastness and prevent damage.
When Should You Use Leather Dye for Sneakers?
Customization: Leather dye offers a fantastic way to make your sneakers stand out. Whether you want a bold new color or a subtle shade change, dyeing allows for endless possibilities in design, helping you express your personal style.
Repairing Scuffs and Scratches: Everyday usage can lead to unsightly marks on your sneakers. Applying leather dye over these imperfections can mask them effectively, making your shoes look as good as new without the need for replacement.
Material Compatibility: Leather and synthetic leather require specific dyes that adhere well to their surfaces. Using the appropriate type of dye ensures that the color penetrates effectively, providing a durable finish that won’t peel or wear off easily.
Seasonal Changes: Fashion trends evolve with the seasons, and updating the color of your sneakers can keep your wardrobe fresh. Dyeing can be a cost-effective way to refresh your footwear collection without needing to invest in new pairs each season.
What Benefits Does Spray Dye Offer for Quick Applications?
Quick drying time is another key benefit, as it allows users to see the results almost immediately, enabling faster project completion and the possibility of multiple layers in a single session if desired.
The variety of colors available in spray dyes means that sneaker enthusiasts can express their creativity and individuality, matching their footwear to outfits or personal preferences with ease.
Durability is essential for sneaker applications since footwear is subject to constant movement and abrasion; quality spray dyes help ensure that the color remains vibrant over time, even with regular wear.
Finally, the versatility of spray dye makes it an attractive option for customizing different sneaker materials, allowing for a broader range of creative applications and ensuring that users can achieve the perfect look for any sneaker type.
How Do You Choose the Best Sneaker Dye for Your Needs?
Choosing the best sneaker dye involves considering various factors to ensure the dye meets your specific needs.
- Type of Material: The material of your sneakers significantly influences the type of dye you should choose. For instance, leather sneakers require dyes specifically formulated for leather to ensure proper adhesion and color application, while synthetic materials may need special dyes that can bond with plastics and rubbers.
- Colorfastness: Evaluating the colorfastness of the dye is crucial for long-lasting results. A dye that is not colorfast may fade quickly with wear or washing, so it’s important to select products that are designed to withstand exposure to elements and frequent use.
- Application Method: Different dyes come with various application methods, such as spray, paint, or soak. Depending on your comfort level and the design you want, you may prefer a spray for even coverage or a paint for detailed work. Understanding the method will help you achieve the best results.
- Brand Reputation: Researching reputable brands can help you find high-quality sneaker dyes. Brands with positive reviews and a history of satisfied customers are more likely to provide effective products, ensuring you get the best value for your investment.
- Environmental Considerations: If you’re environmentally conscious, look for dyes that are water-based or non-toxic. These options are safer for both you and the planet, and they often carry fewer harmful chemicals, making the dyeing process more pleasant and sustainable.
What Factors Should You Consider for Colorfastness and Durability?
When selecting the best sneaker dye, several factors related to colorfastness and durability should be considered:
- Type of Fabric: Different materials react differently to dyes, affecting color absorption and longevity.
- Water Resistance: A dye that offers water resistance will help maintain color integrity in wet conditions.
- UV Resistance: UV protection prevents fading from sunlight exposure, ensuring colors stay vibrant longer.
- Heat Resistance: Dyes that withstand high temperatures will prevent discoloration during wear or cleaning.
- Application Method: The method of application can influence the dye’s durability, with some techniques providing stronger bonds to the fabric.
Type of Fabric: The fabric of the sneaker plays a crucial role in how well the dye adheres and how vibrant the final color will be. Natural fibers like cotton may absorb dye differently than synthetic materials like polyester, so knowing the sneaker’s material is essential for achieving the desired result.
Water Resistance: Selecting a dye that provides water resistance is important for sneakers, as moisture can lead to color bleeding or fading over time. A water-resistant dye will help safeguard the sneakers against rain or spills, maintaining their appearance longer.
UV Resistance: Sneakers are often worn outdoors, exposing them to sunlight that can fade colors over time. Choosing a dye with UV resistance will help protect against this fading, ensuring that the sneakers look fresh and vibrant, even after prolonged sun exposure.
Heat Resistance: Dyes that possess heat resistance are less likely to change color when exposed to high temperatures, such as during washing or drying. This is particularly important for maintaining the integrity of the color after multiple cleans.
Application Method: The way a dye is applied can significantly affect its durability; for instance, immersion dyeing can penetrate the fibers deeply, while surface applications may wear off more quickly. Understanding the application method will help in choosing a dye that offers the best bond and longevity for the sneaker fabric.
How Does the Application Method Affect Your Final Results?
The application method significantly influences the final results when dyeing sneakers, affecting both color intensity and durability.
- Spray Method: This method involves applying dye using a spray bottle, which allows for even and controlled coverage. It is ideal for achieving a gradient effect or for intricate designs, but requires careful masking of areas to prevent overspray and ensure clean lines.
- Dip Method: Involves fully submerging the sneakers in a dye solution, ensuring uniform color saturation throughout the material. This method is effective for achieving bold and vibrant colors, but can sometimes lead to uneven results if the sneakers are not fully submerged or if the dye is not mixed properly.
- Brush Method: Utilizing a brush to apply dye offers precision and allows for detailed work on specific areas of the sneaker. It is particularly useful for customizing designs or touch-ups, but can lead to streaking if not applied carefully and evenly.
- Sponge Method: This technique uses a sponge to dab dye onto the sneaker surface, which can create a textured appearance. It allows for a more controlled application and is great for blending colors, though it may take longer to achieve the desired depth of color compared to other methods.
- Heat Setting: While not a dyeing method in itself, applying heat after dye application can help set the color and improve durability. This process can be important for ensuring that the dye bonds well with the material, preventing fading and wear over time.
What Are the Top Brands or Products for Sneaker Dye?
The best sneaker dye brands and products can help rejuvenate and personalize your footwear.
- RIT Dye: RIT Dye is a popular choice for sneaker enthusiasts due to its versatility and range of colors. It can be used on various materials, including cotton, polyester, and nylon, making it suitable for most sneaker fabrics. Additionally, RIT offers both liquid and powder forms, allowing users to choose the application method that best suits their project.
- Dylon Fabric Dye: Dylon Fabric Dye is known for its vibrant colors and ease of use, particularly for natural fibers. This dye requires minimal preparation and can be used for hand dyeing, making it accessible for DIY projects. Dylon also offers a variety of shades, ensuring that users can achieve the exact look they want for their sneakers.
- Angelus Leather Dye: Angelus Leather Dye is specifically formulated for leather and synthetic leather sneakers, providing a durable and long-lasting finish. The dye penetrates the material for deep, vibrant colors that resist cracking and fading over time. It’s a favorite among sneaker customizers looking to refresh or completely change the color of leather shoes.
- iDye Poly: iDye Poly is ideal for synthetic materials like polyester and nylon, which are common in modern sneakers. This dye is designed to work well with high-temperature dyeing methods, allowing for intense color saturation. iDye Poly is particularly useful for sneaker lovers looking to achieve bold, long-lasting results on athletic shoes.
- Fabric Markers by Sharpie: While not a traditional dye, Sharpie Fabric Markers can be used for detailed designs and color touch-ups on sneakers. They are easy to use and allow for precise application, making them perfect for adding custom artwork or patterns. Sharpie markers are also permanent and water-resistant once set, ensuring that your designs remain intact through wear.
Which Sneaker Dyes Are Most Recommended by Experts?
Experts recommend several sneaker dyes known for their effectiveness and quality:
- RIT Dye: A popular choice among sneaker enthusiasts, RIT dye is versatile and works well on various materials, including cotton and polyester. It comes in liquid and powder form, allowing for multiple dyeing techniques such as immersion or tie-dye, making it suitable for both beginners and advanced users.
- Dylon Fabric Dye: Known for its vibrant colors and ease of use, Dylon fabric dye is ideal for natural fabrics like cotton and linen. It is available in several shades and can be used in a washing machine or with hand-dyeing methods, providing flexibility for different dyeing projects.
- Acrylic Leather Dye: Specifically designed for leather sneakers, acrylic leather dye offers a durable and long-lasting finish that bonds well to leather surfaces. It comes in various colors and can be mixed to create custom shades, making it a favorite for restoring or customizing leather footwear.
- iDye Poly: This dye is formulated specifically for synthetic fabrics, making it an excellent choice for sneakers made from polyester or nylon. iDye Poly works with hot water dyeing methods and produces vibrant, fade-resistant results, ensuring that the color stays bright even after multiple washes.
- Angelus Leather Paint: While technically not a dye, Angelus leather paint is highly regarded for customizing and restoring sneakers. It provides a wide range of colors and finishes, including matte and glossy, and adheres well to leather, making it ideal for intricate designs or touch-ups.
How Do You Prepare and Apply Sneaker Dye Successfully?
To prepare and apply sneaker dye successfully, it is essential to follow a series of steps that ensure the best results.
- Choosing the Right Sneaker Dye: The best sneaker dye should be compatible with the material of your sneakers, whether they are leather, canvas, or synthetic. Popular brands like Rit Dye and Angelus offer specific formulas designed for different materials, ensuring vibrant and long-lasting color.
- Preparation of Sneakers: Before dyeing, clean your sneakers thoroughly to remove dirt, oils, and any existing finish. This can be done using a soft brush and mild soap; drying them completely is crucial to ensure the dye adheres properly.
- Protecting Surrounding Areas: To prevent accidental staining, cover surrounding areas with plastic or old newspapers. Wearing gloves is also advised to protect your hands from dye stains during the application process.
- Mixing the Dye: Follow the manufacturer’s instructions to mix the dye to the desired shade. For darker colors, you may need to apply multiple coats; testing the dye on a small, inconspicuous area of the sneaker first can help you gauge the final color.
- Applying the Dye: Use a brush, sponge, or spray bottle to apply the dye evenly across the sneaker surface. It’s essential to work in small sections, allowing each area to dry fully before moving on to the next to ensure an even finish.
- Setting the Dye: After applying the dye, allow your sneakers to dry completely in a well-ventilated area. Some dyes may require heat setting, which can be achieved using a hairdryer on a low setting or placing the sneakers in a warm area to help the dye bond with the material.
- Sealing the Dye: Once the dye is dry, applying a sealant can help protect the color from fading and ensure durability. Products like waterproof spray can also provide additional protection against stains and moisture.
What Steps Should You Take to Prepare Your Sneakers for Dyeing?
To prepare your sneakers for dyeing, follow these essential steps:
- Clean the Sneakers: Thoroughly clean your sneakers to remove dirt, dust, and oils that can prevent the dye from adhering properly. Use a mild detergent mixed with water and a soft brush to scrub the surfaces, paying special attention to seams and crevices.
- Remove Laces and Insoles: Take out the laces and insoles to ensure even dye application. This prevents them from absorbing dye and allows you to achieve a clean finish on the sneaker’s upper material.
- Test the Material: Conduct a patch test on a small, inconspicuous area of the sneaker to see how the material reacts to the dye. Different materials absorb dye differently, and testing will help you avoid unexpected results.
- Protect Surrounding Areas: Cover any areas you do not want to dye, such as rubber soles or logos, with painter’s tape or plastic wrap. This will help maintain the original color of those sections and create a cleaner overall look.
- Choose the Right Dye: Select a dye that is suitable for the material of your sneakers, such as fabric dye for canvas or leather dye for leather sneakers. The best sneaker dye will vary based on the sneaker’s material and the desired color outcome.
What Techniques Can Ensure an Even and Professional Finish?
To achieve an even and professional finish when dyeing sneakers, several techniques can be employed:
- Preparation of Sneaker Surface: Properly cleaning the sneaker surface is crucial for even dye absorption. Removing dirt, oils, and previous finishes ensures that the dye adheres uniformly, preventing patchiness in color.
- Choosing the Right Dye: Selecting a dye specifically designed for sneaker materials, such as leather or synthetic fabrics, ensures compatibility and longevity. The best sneaker dyes often have formulations that penetrate the material effectively, providing a vibrant and durable finish.
- Applying Dye in Thin Layers: Instead of saturating the sneaker with a heavy application of dye, applying it in thin layers helps control the intensity and achieve an even coat. This technique allows for greater control over the final color, enabling adjustments as needed.
- Using a Spray Method: A spray application can provide an even distribution of dye, reducing the risk of streaks or uneven patches. This method is particularly effective for larger surface areas and can help achieve a more professional appearance.
- Heat Setting the Dye: After dyeing, applying heat through a heat gun or hairdryer can help set the dye, locking in the color and enhancing its vibrancy. This step is essential for ensuring that the dye adheres properly and resists fading over time.
- Finishing with a Sealer: Applying a clear sealer or finish after dyeing provides additional protection against wear and tear. This can help maintain the color integrity and give the sneakers a polished look.